“Photography” comes from two Latin words, “photo”--light, and “graph”--write, so figuratively we are “writing with light.” Light is the most important component of every picture, but especially with portrait photography.
Can we “everyday” photographers create great portraits without a professional studio? The answer is “yes and easily.” We’ll limit ourselves to one light source and shooting in/converting to black and white, so that we only have to focus on the light and not colors. If using your phone, check for a B/W setting or convert your shots in an app.
Pro tip: In almost every case, aim to capture the "catchlight," that little sparkle in the eye.
You will need:
- A lamp, preferably a floor model with a flexible gooseneck. Alternatively use an elevated table lamp without the shade. Or a helper with a flashlight or cell phone.
- A chair
- A tripod to avoid camera shake in low light.
- A light-colored wall in a darkened space about 6 feet square, enough to move around comfortably. (I used a bedroom behind the door. A hallway can also work.) Wall color is not important because you will be shooting in/converting to black and white. If necessary, cover a dark wall with a 20” x 28” white cardboard or a blanket or bed sheet.
- Optional: A reflector. Either a mirror, white cardboard, or piece of cardboard covered with crinkled aluminum foil.
- Also optional: Black posterboard to change the background.
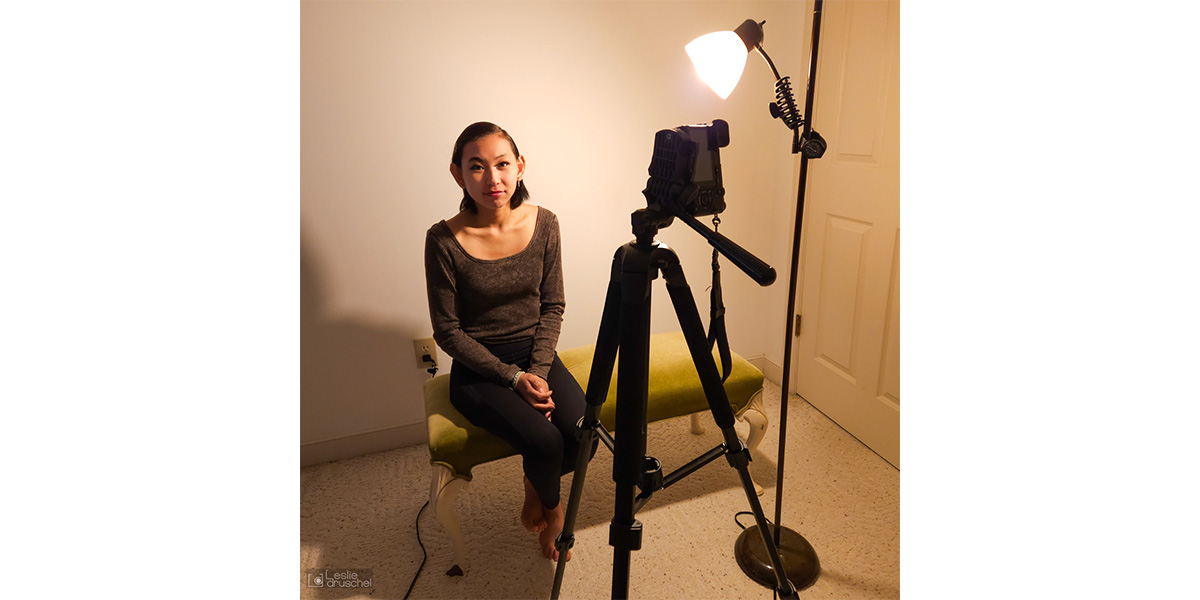
Set-up of my simple studio. All examples shot with my Sony a6000 mirrorless with a 35mm fixed lens.
Now the fun part!
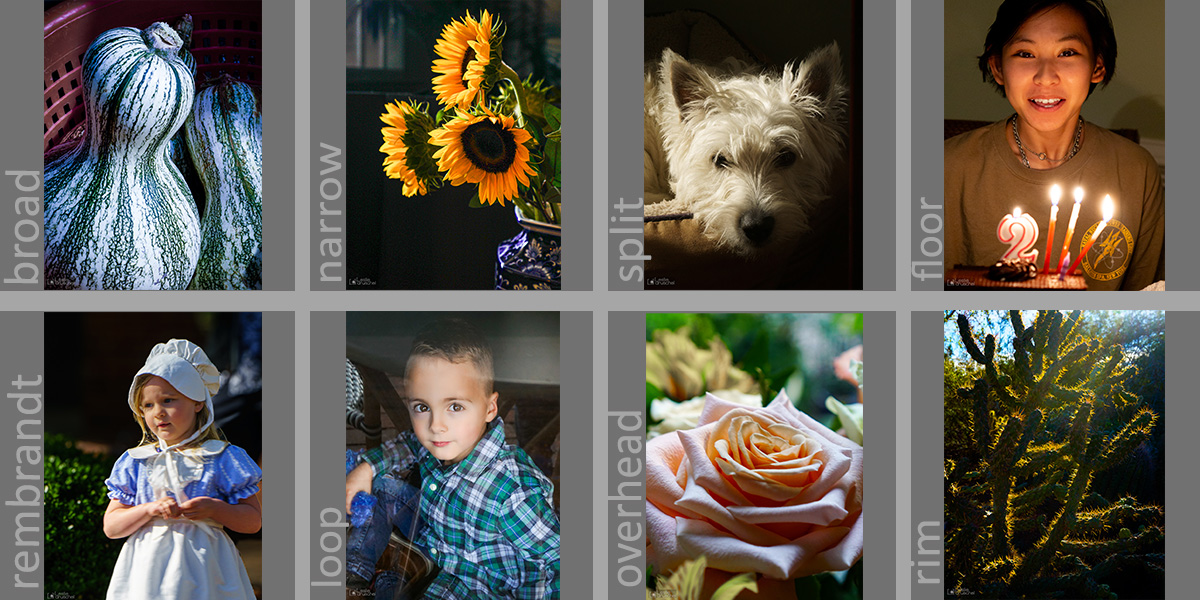
Below are steps for 10 types of one-source lighting dependent only on moving the light. At the end are other subjects like flowers and food using one source indoors or even outdoors. We’ll start with our simplest set-up, broad lighting!
Broad Light
What it does: Broad lighting will broadly illuminate most of the face, leaving the side farthest from the light in shadow. Your subject will look a little bit reserved or shy. Usable for any age, but perfect for older people, children, or anyone who’s self-conscious about their skin.
Get the look: Position the subject’s body 45 degrees to the camera, and turn their face toward the lens. Direct the light at shoulder level toward the nearest side of the face--the broad side keeping the rest in shadow. If you are able to adjust your background in editing, experiment with exposure. See how the whole portrait's mood changes.
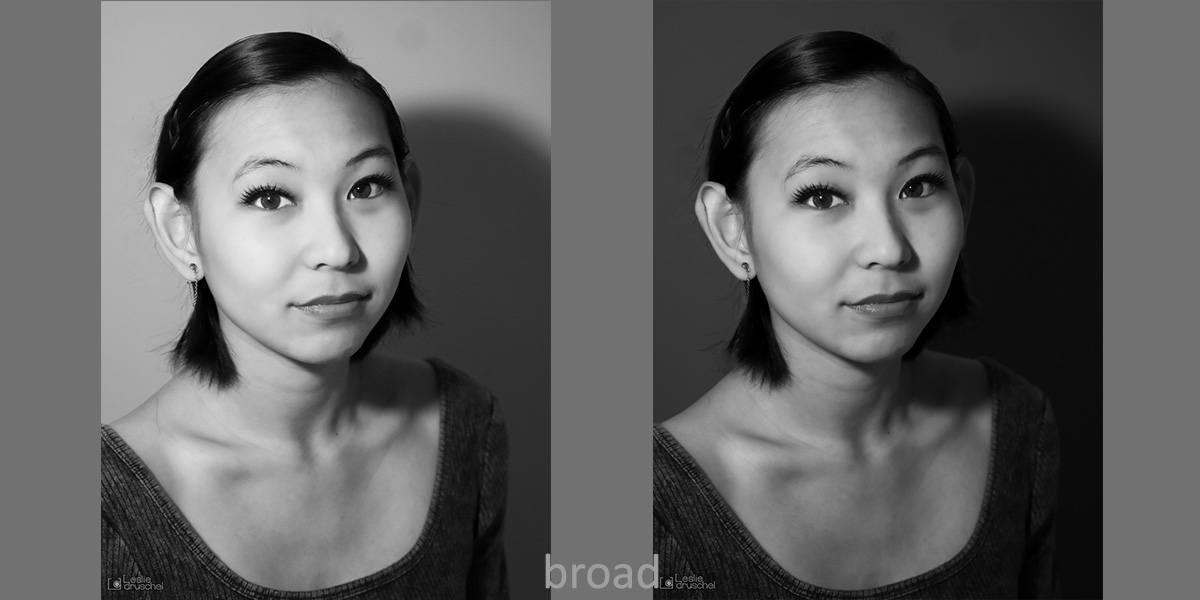
Broad light. ISO 400 1/60 f/4
Narrow Light
What it does: Narrow lighting is the opposite of broad lighting. There will be a narrow band of light on the farther side of the face, with the nearer side in shadow creating a sense of mystery. Useful for both sexes.
Get the look: Keep your subject in the same position as broad lighting, but move the light source to the other narrow side of the face.
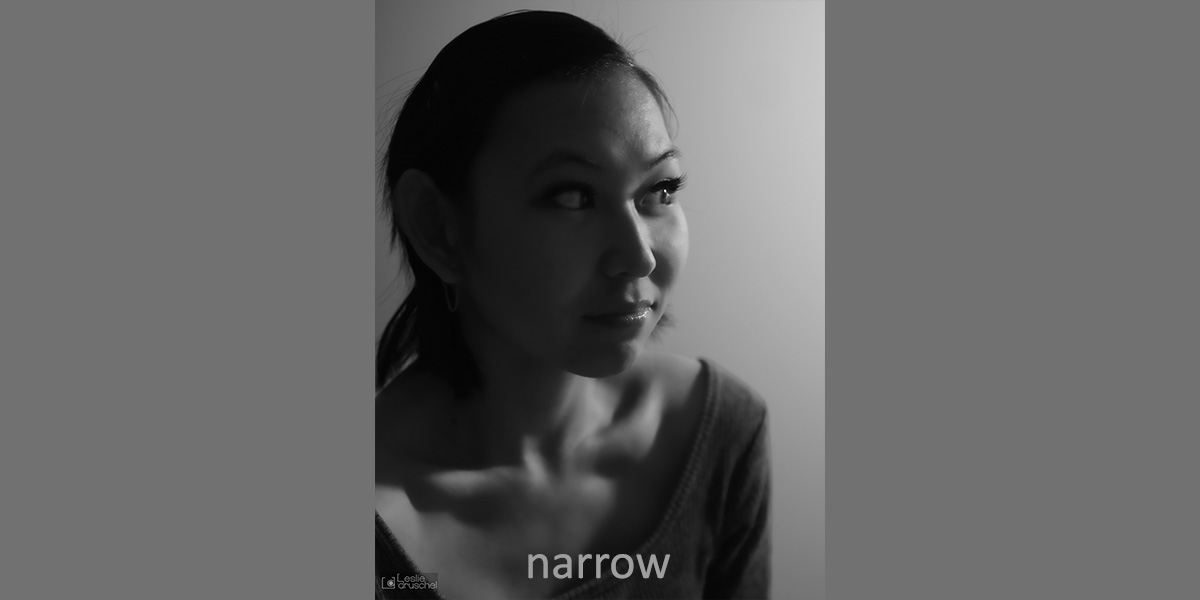
Narrow Light. ISO 400 1/50 f/2.8
Split Light
What it does: Split lighting will easily create a confrontational, even sinister mood and is just as easily accomplished.
Get the look: Turn your subject’s body and face directly to the camera. Position the light 90 degrees to the subject at shoulder level. The face will be split directly in half, light and dark. The closer the light, the harsher the contrast. A reflector near the dark side can soften the look.
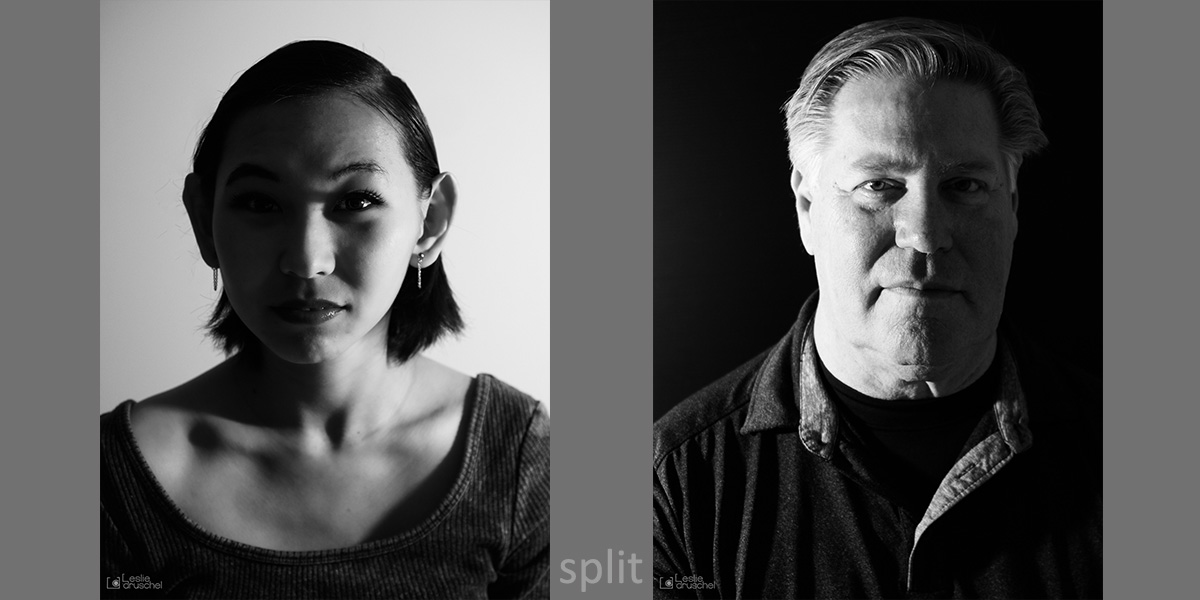
Split Light. Left: ISO 400 1/50 f/2.8 Right: ISO 200 1/20 f/1.8
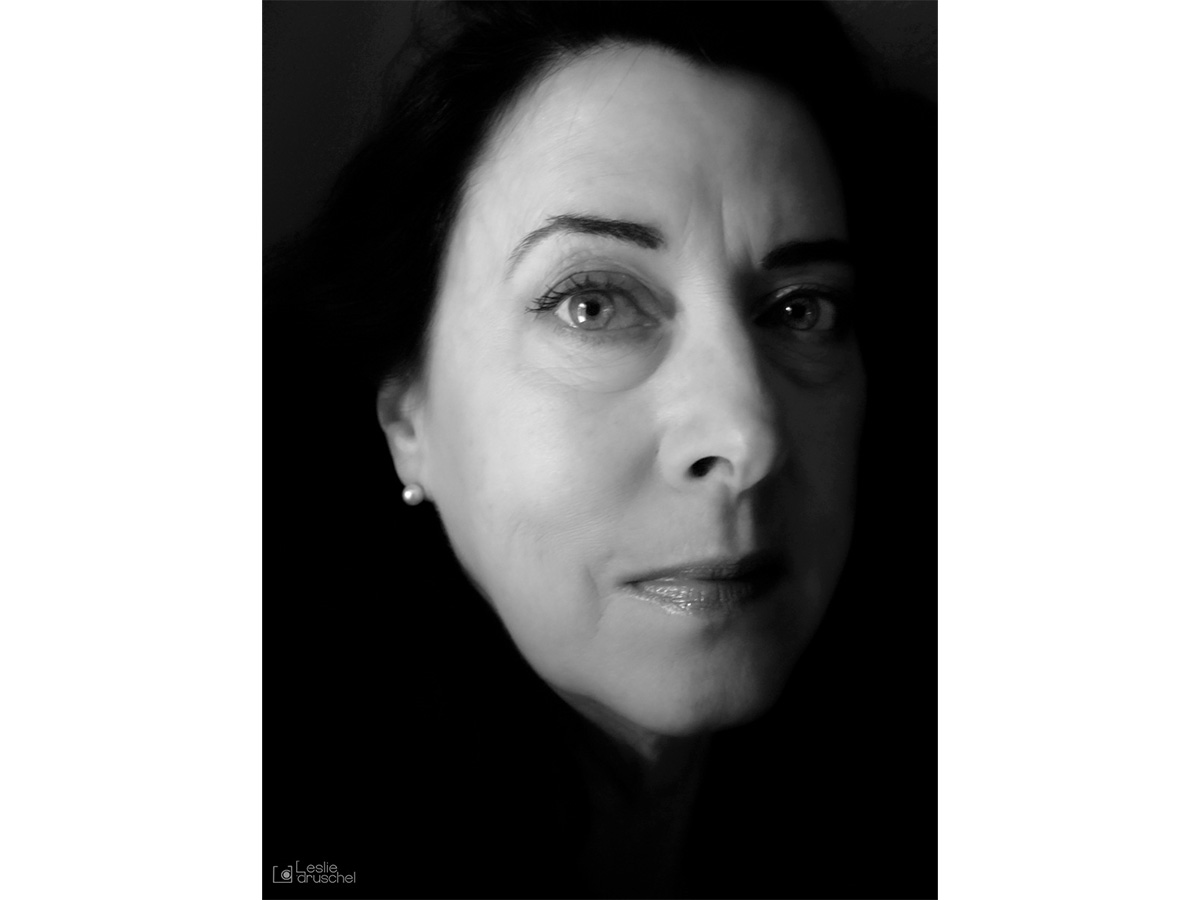
Rembrandt Light
What it does: Named after the Dutch Master who popularized the style, Rembrandt lighting is characterized by a small inverted triangle of light under the eye further from the source. The skin’s imperfections are more noticeable, so keep that in mind.
Get the look: Follow the set-up for narrow lighting (where most of the face was in shadow), but circle the light source toward the front to about 45 degrees from the face, until the triangle of light appears. Optionally, a reflector held at 45 degrees near the darker side of the face will soften that side with bounce lighting.
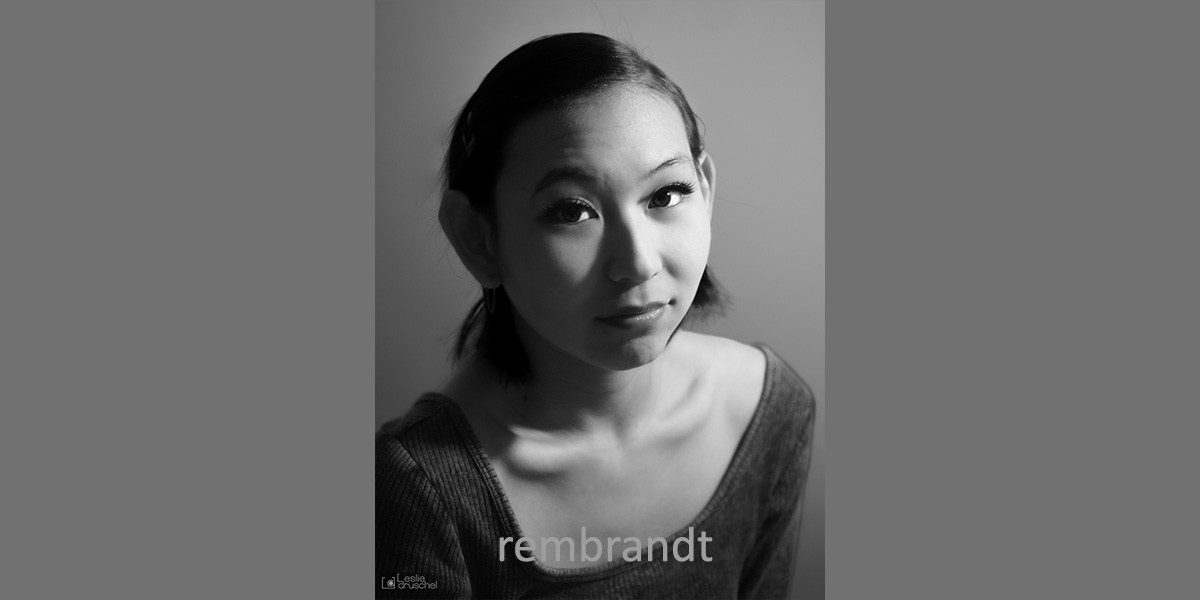
ISO 400 1/30 f/2.8
Butterfly Light
What it does: A soft light angled from above creates small butterfly-shaped shadows underneath the nose and chin. The effect is slimming, brightening both eyes and cheeks equally while disguising the neck. A very popular look for women’s portraits.
Get the look: Position the light source next to the camera, but higher than the subject and pointing down 45 degrees. Aim to create two small shadows: one under the nose, the other under the chin.
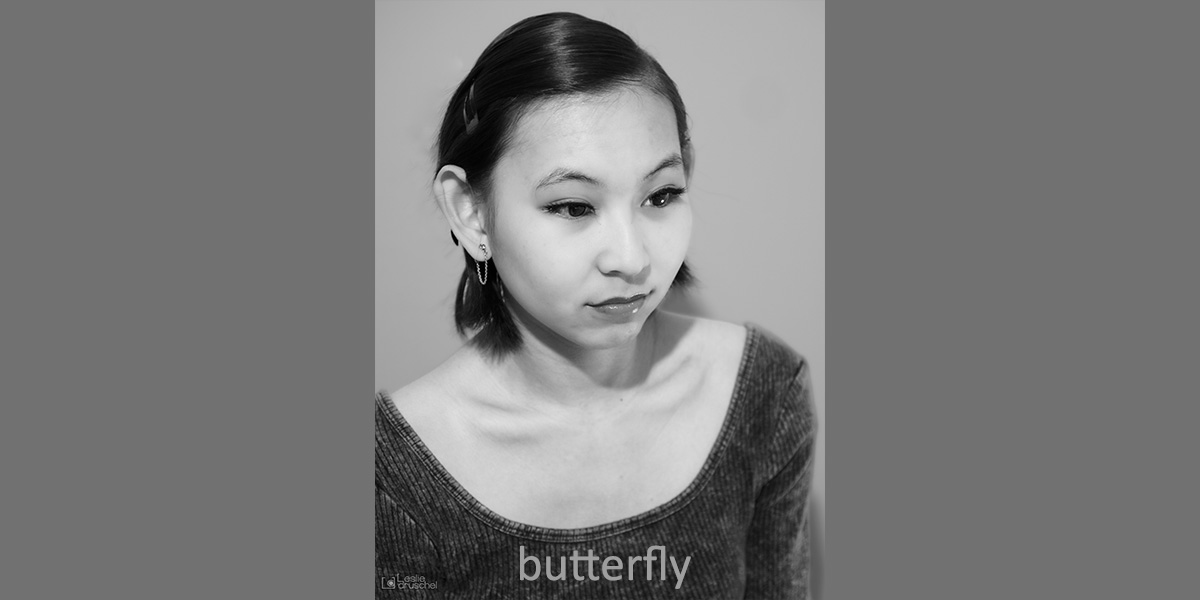
Butterfly Light. ISO 400 1/15 f/2.8
Loop Light
What it does: Loop light falls between the strong shadows of Rembrandt and the well-distributed light of butterfly lighting. It’s softer than Rembrandt lighting, but more dramatic than butterfly.
Get the look: Start with the butterfly set-up. Keep the light source high, but move it 45 degrees away from the camera. There should be a short shadow angling off the nose and a bridge of light between the mouth and the far cheek. A reflector can be used on the darker side of the face to add subtle light.
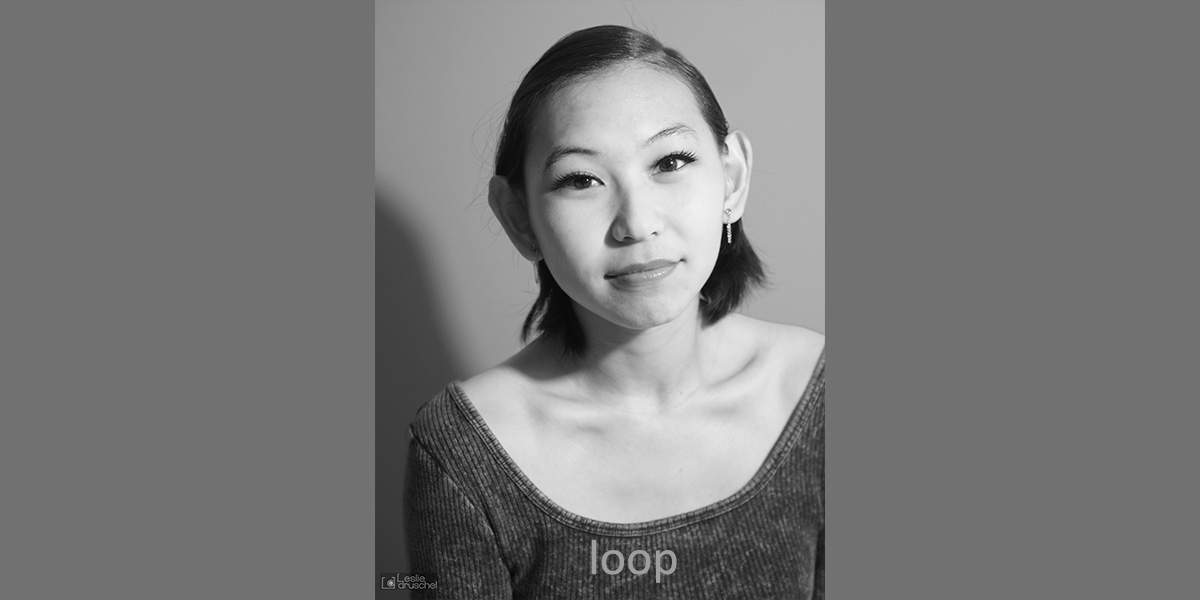
Loop Light. ISO 400 1/20 f/2.8
Clamshell Light
What it does: Having light from above and below, like an open clam, is how this effect got its name. But it still uses only one source, the other being reflected. Clamshell light creates subtle shadows under the cheekbones and the chin while being balanced with light from above. The result is a slimming effect and is easy on those with less-than-perfect skin which most subjects would welcome.
Get the look: Set up your light source as in the butterfly-- next to the camera, higher than the subject, the light down at 45 degrees. Have your subject face the camera and hold a reflector on their lap. Experiment with the distance between the reflector and the chin to see how much light is reflected. Aim for a balance of light from above and below. Avoid a blown-out (over-exposed) image.
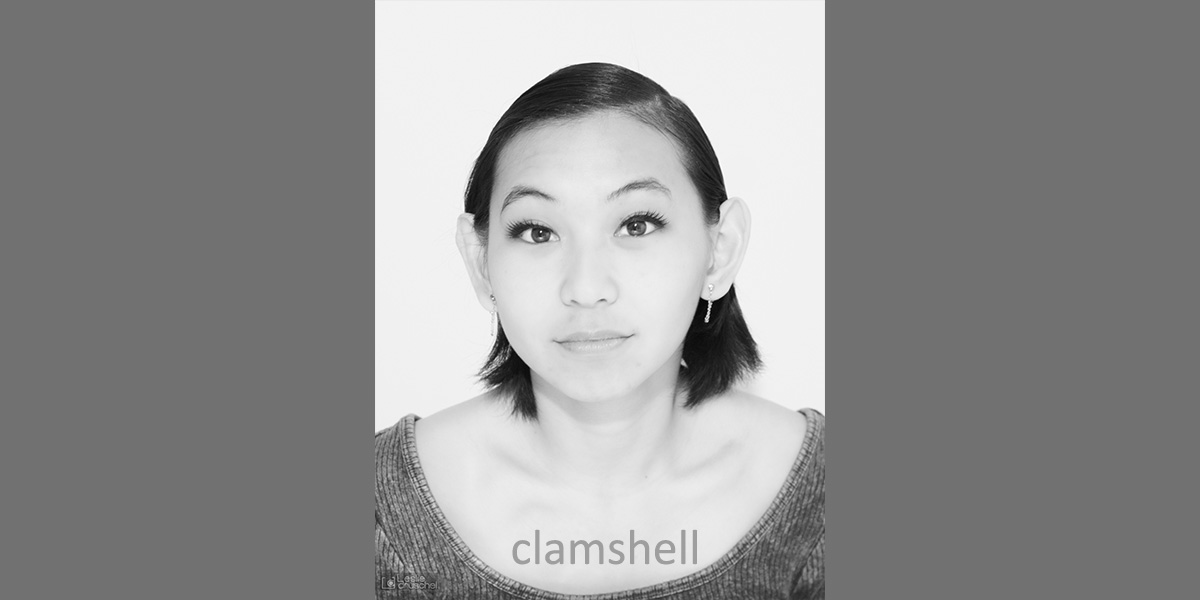
Clamshell Light. ISO 400 1/13 f/4
Rim or Silhouette Light
What it does: Rim lighting is an exciting look that emphasizes the edges of the subject. It’s particularly suited when curves or profiles are important to the story. It frequently occurs naturally when the sun is low in the sky.
Get the look: This effect can be challenging to create. Manual mode is a must to control the amount of light. Change your background to a dark color using poster board. Position your light behind the subject so that only their edge is seen. (Not having a volunteer, I taped a phone flashlight to the wall and then moved my subject around to illuminate just her outline.) You can subtly include the subject’s face by bouncing the light back with a reflector.
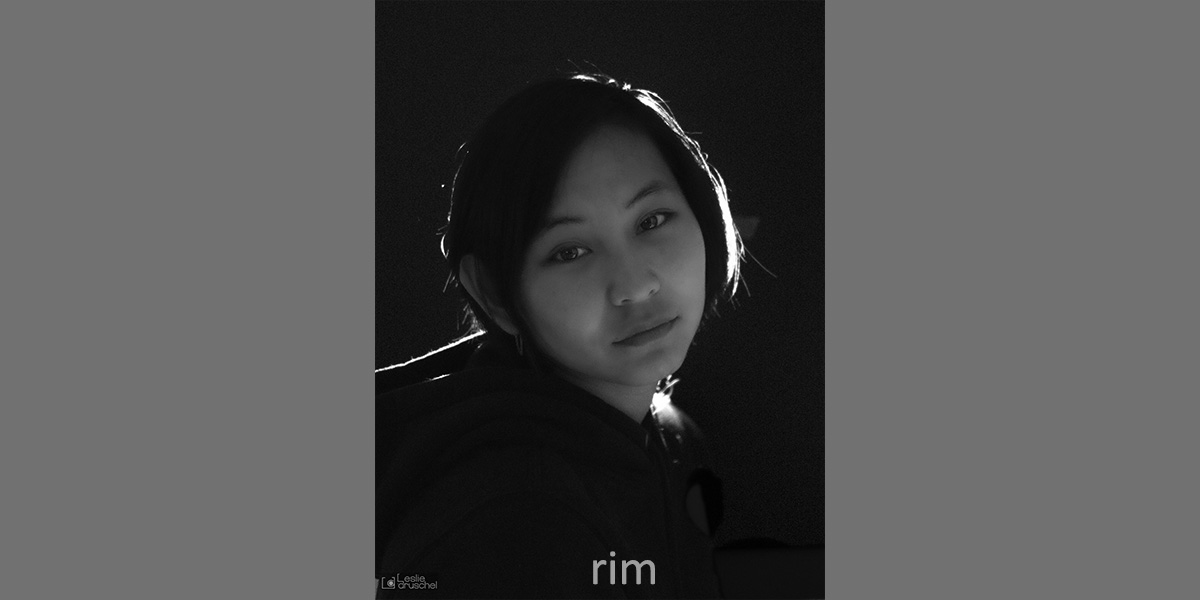
Rim Light. ISO 2000 1/20 f/1.8
Floor Light
What it does: For a dynamic image, you can’t go wrong with floor lighting. It’s easy to do and can be really fun for your kids.
Get the look: Against a dark wall simply take a strong light source and have your subject hold it in their lap pointing up. Experiment with the position to exaggerate the face’s contours.
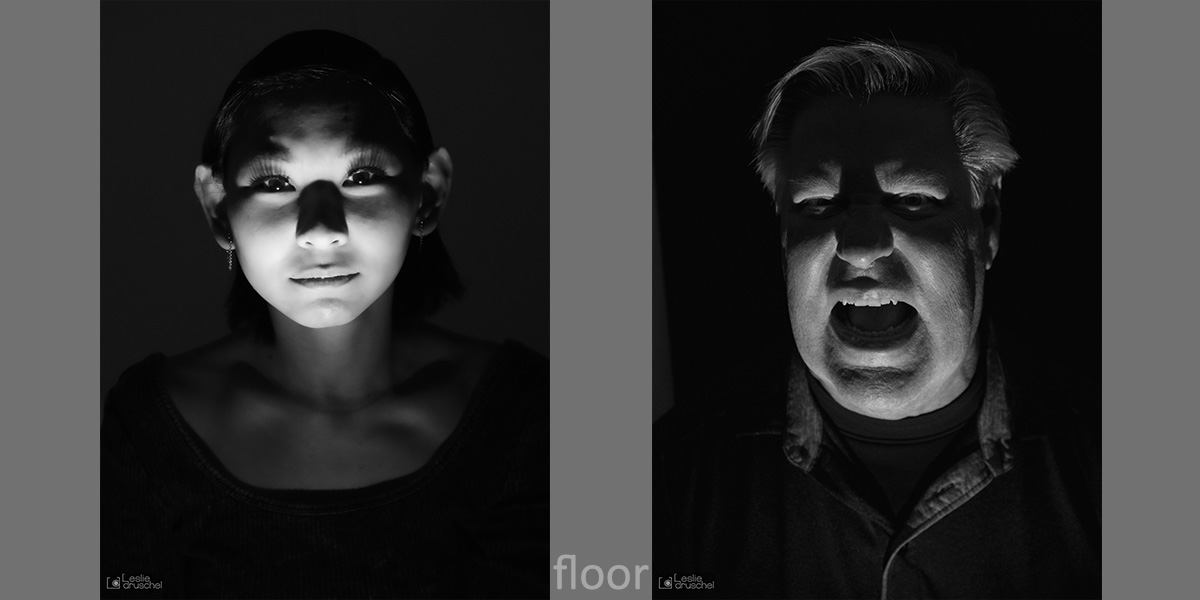
Floor Light. Left: ISO 1000 1/20 f/2.5 Right: ISO 200 1/20 f/2.5
Overhead Light
What it does: This lighting angle can provide either an ethereal mood or a foreboding look depending on your subject.
Get the look: Place your light above your subject aiming straight down or slightly to the side. (They might have to sit very close to the light’s pole or you can use an overhead fixture.) Experiment with changing the distance between the source and the top of your subject. Closer will create stronger shadows.
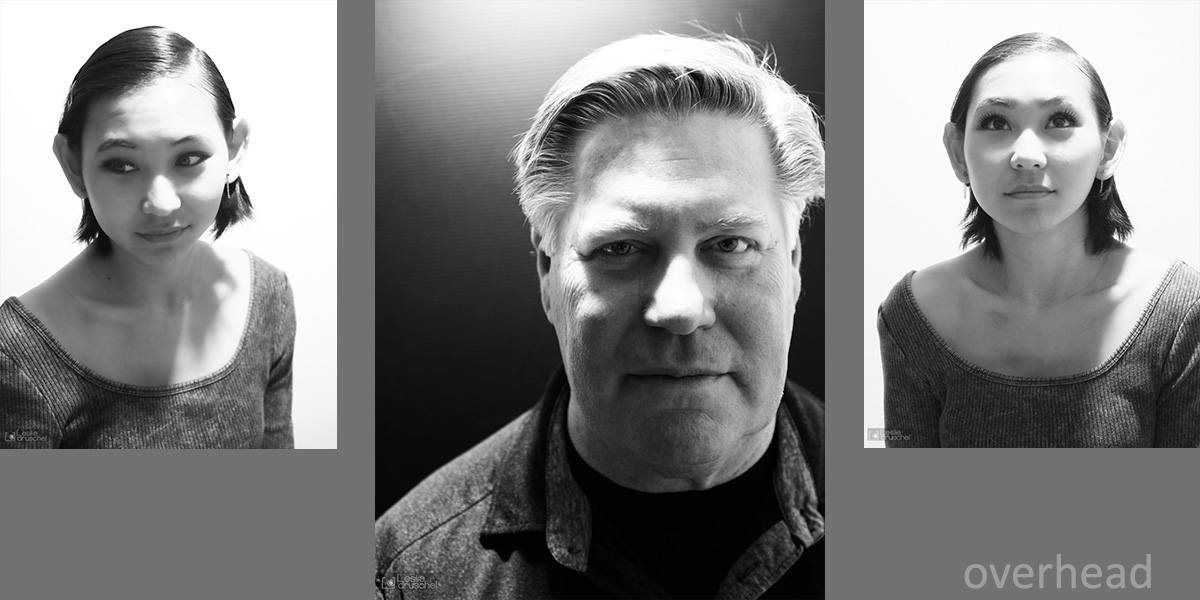
Overhead Light. Left: ISO 800 1/60 f/2.8 Right: ISO 200 1/20 f/2.5
And that’s it!
Ten different looks from a single light! Now that you’re familiar with them, you can apply your skill to other subjects like food, flowers, and pets. (See my examples.) You can use natural light too whether from a window or whatever nature provides you outdoors.
Remember! Your purpose in photography is to “write with light,” so take advantage of it from every direction and write a great story!
Do you use light to write with? What’s your favorite lighting situation?