Double exposure is a technique of combining two images into one. There are two types of double exposure, one that is done in the camera and the other that is done post processing.
The first image is a double exposure created in the camera.
So let us start with the Camera
- For a Canon you need to check through your Shooting Settings Menu to find the Multiple exposure settings.
- On a Nikon, the Multiple exposure is in the Photo Shooting Menu.
- For other makes I suggest that you google your camera's make and model, and double exposure and you will find out whether it is possible or not.
- Phone cameras don't tend to do a double exposure, but there is always an app to help.
If you don't have your camera's manual to hand, google it and download the pdf version. It is useful to have as you can search for what you are looking to do, and go straight to the page.
You need to think firstly about what you are trying to achieve. Double exposures work well when you have a subject as one of the photos, and the second as more of an abstract or landscape photo with textures. It also works well if you have two photos of one person in different positions.
Some ideas for what sort of photos to take
- First photo: anything (an object) - Second photo: a textured image
- First photo: a person - Second photo: a beach scene / a forest / mountain landscape
- First photo: an animal - Second photo: a field of crops
- First photo: a vase - Second photo: a bouquet of flowers
- First photo: a simple musical instrument - Second photo: pages of sheet music.
Some tips for creating a good double exposure
- UNDEREXPOSE your subject; this is an important part as you don't want an overexposed image at the end.
- For the subject make sure that your background is plain black or plain white also works well.
- Choose a textured eye-catching background for the second photo.
- Expose your second photo correctly.
How I Created a Double Exposure in Photoshop
Some cameras don't have double exposure, or you may prefer to do your double exposure once it is out of the camera. It is still a good tip to under exposure the photos in the camera.
If you take your photos in RAW or JPG and then process them in Lightroom, save them as the biggest .jpg that you can. It is best to work with the best quality and then you can downsize it for uploading to Facebook, Instagram etc.
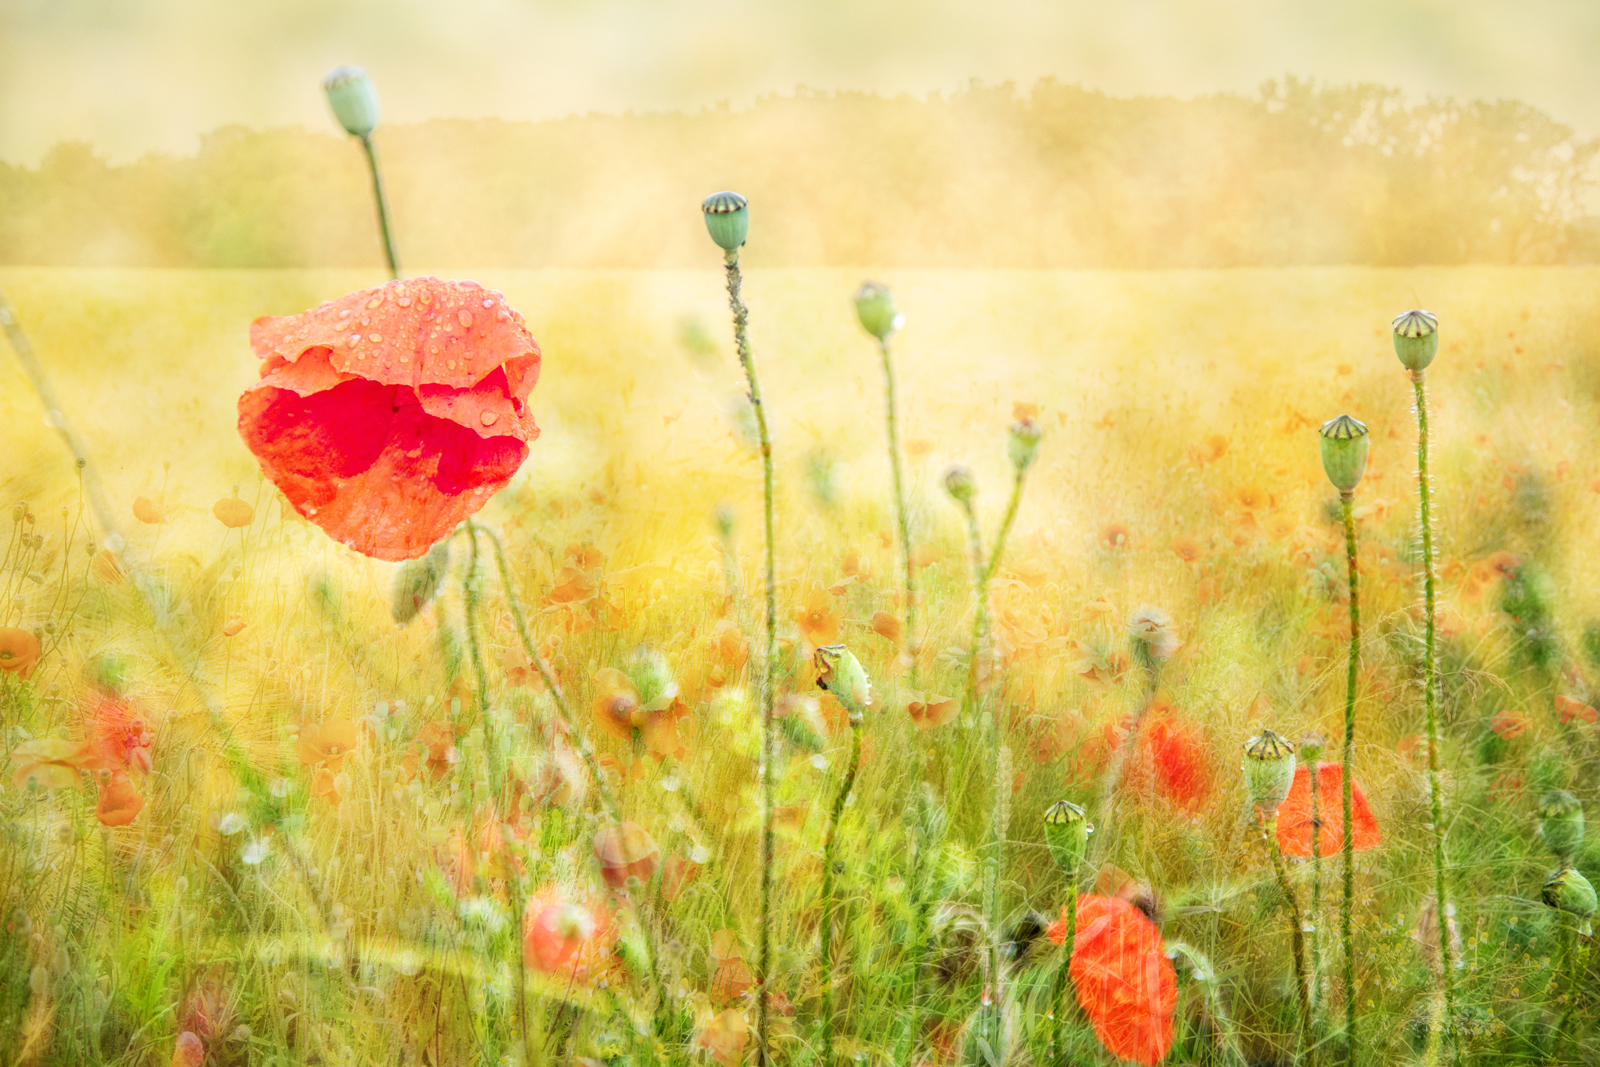
A basic double exposure in Photoshop.
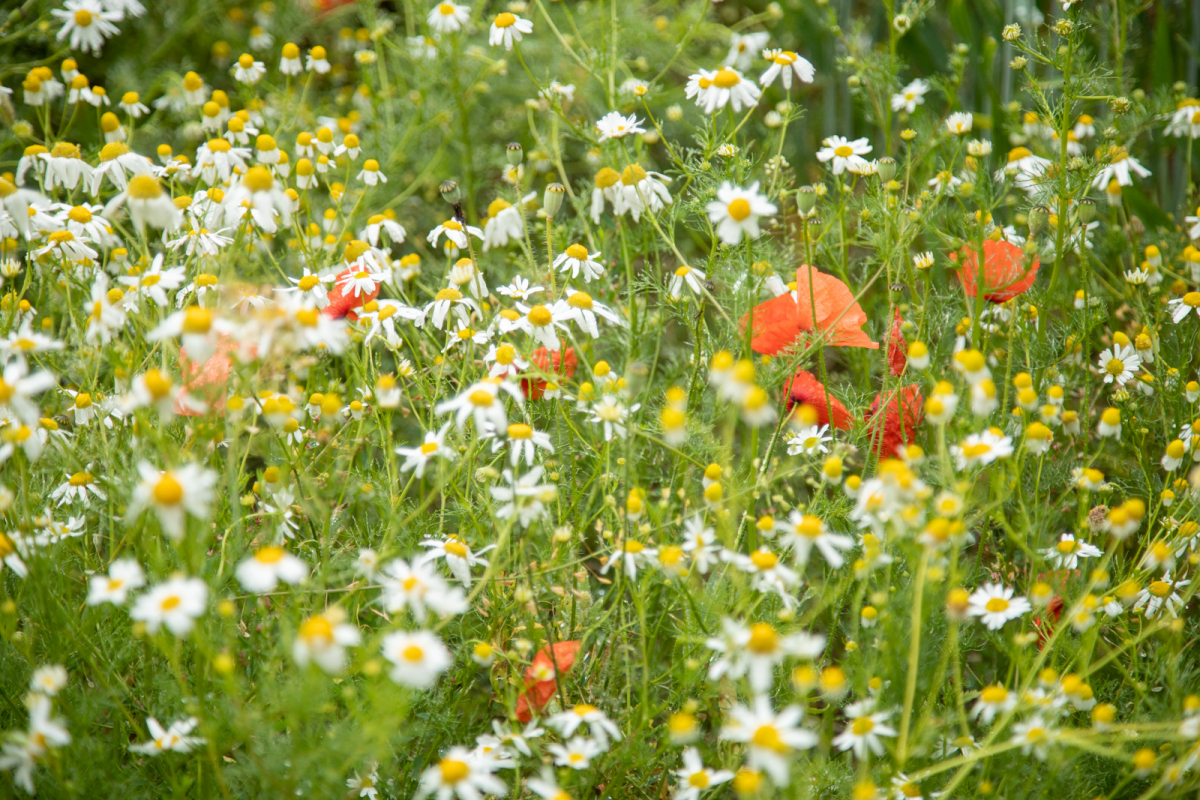
Here are my two finally photos that I want to merge together.

Open your first photo in Photoshop and then add the second photo:
- File > Place Embedded... - place the photo in the correct position that you want, and make the right size that you want.
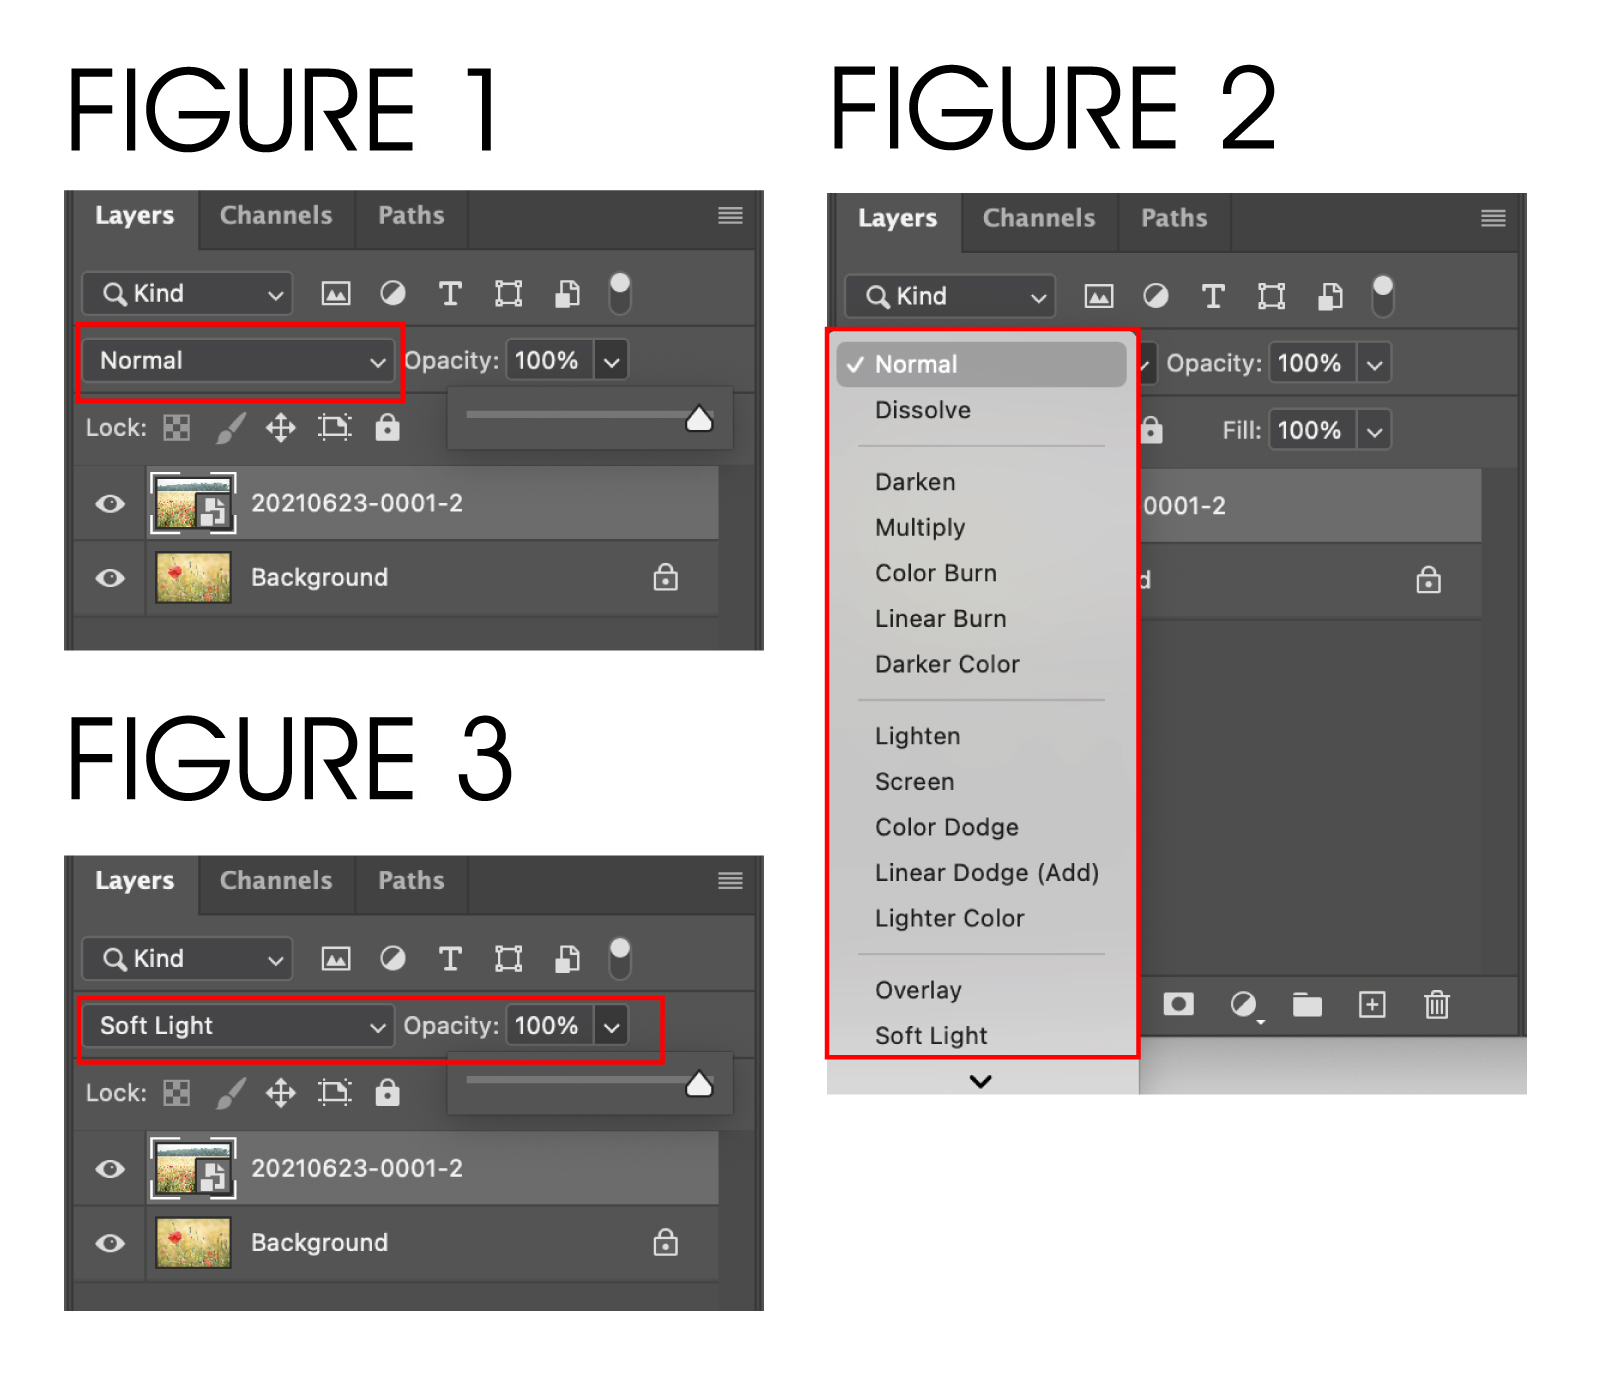
- Your Layers Window should look like Figure 1
- Then click on Normal and you get a drop down menu as in Figure 2
- Choose a style that you want to go with as in Figure 3, (you can use the down or up arrow to click through) for this instance I went with soft light, you can also change the Opacity from 100% until you have the look that you are going for.
- And eh volia you have a double exposure that you can then save as a .psd - which means that you can go back into the file and change it around, but you also need to save it for sharing.
- File > Export > Export As - make sure that you reduce the size for sharing, and that you make sure it is .jpg (this is the best format for photographs)
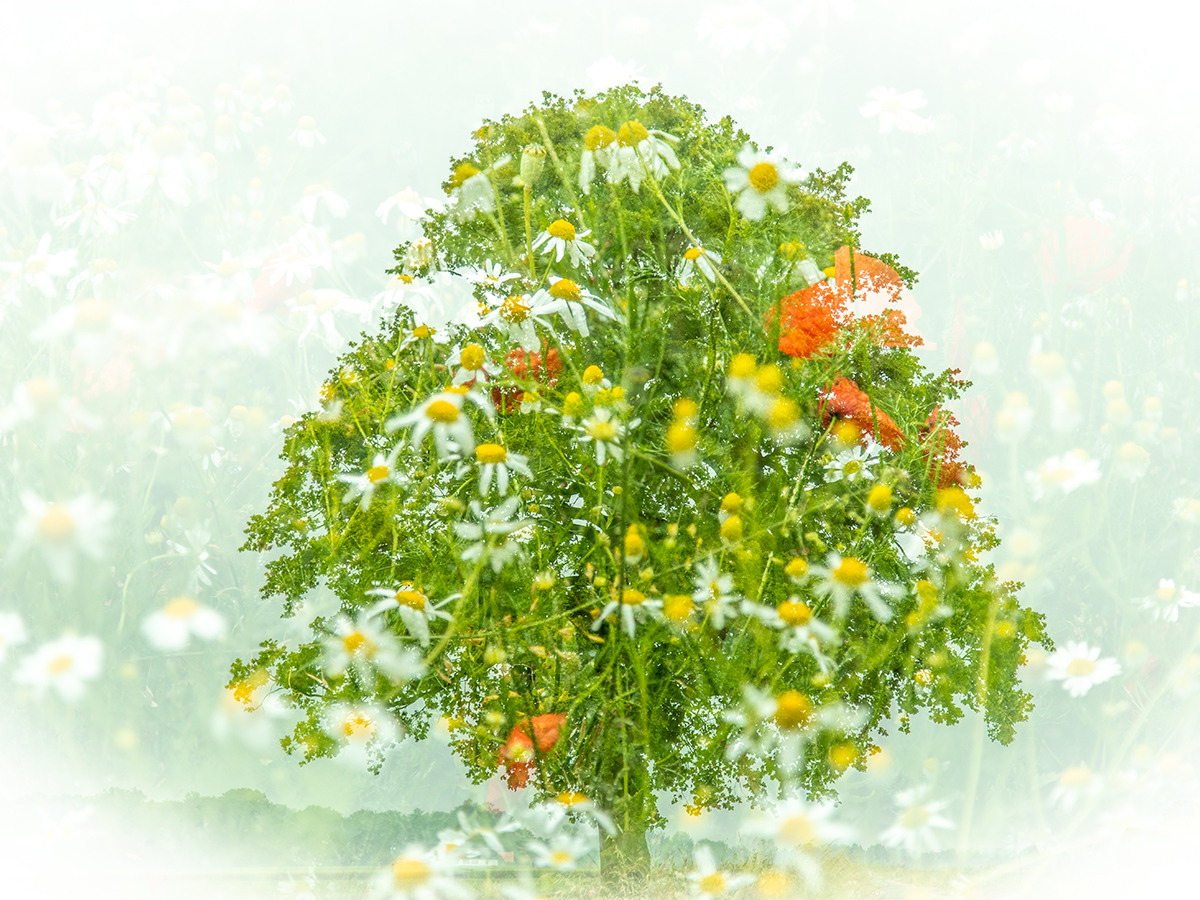
So that was reasonably easy, but what if you want to use a layer mask, as in the top tree photo.
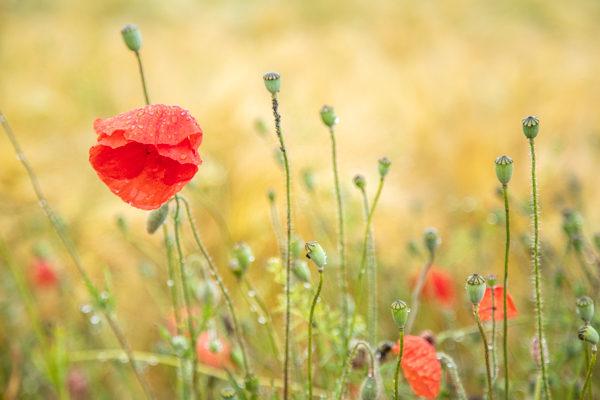
Here are the two images

- Open your first photo in Photoshop and then add the second photo
- File > Place Embedded... - place the photo in the correct position that you want, and make the right size that you want.
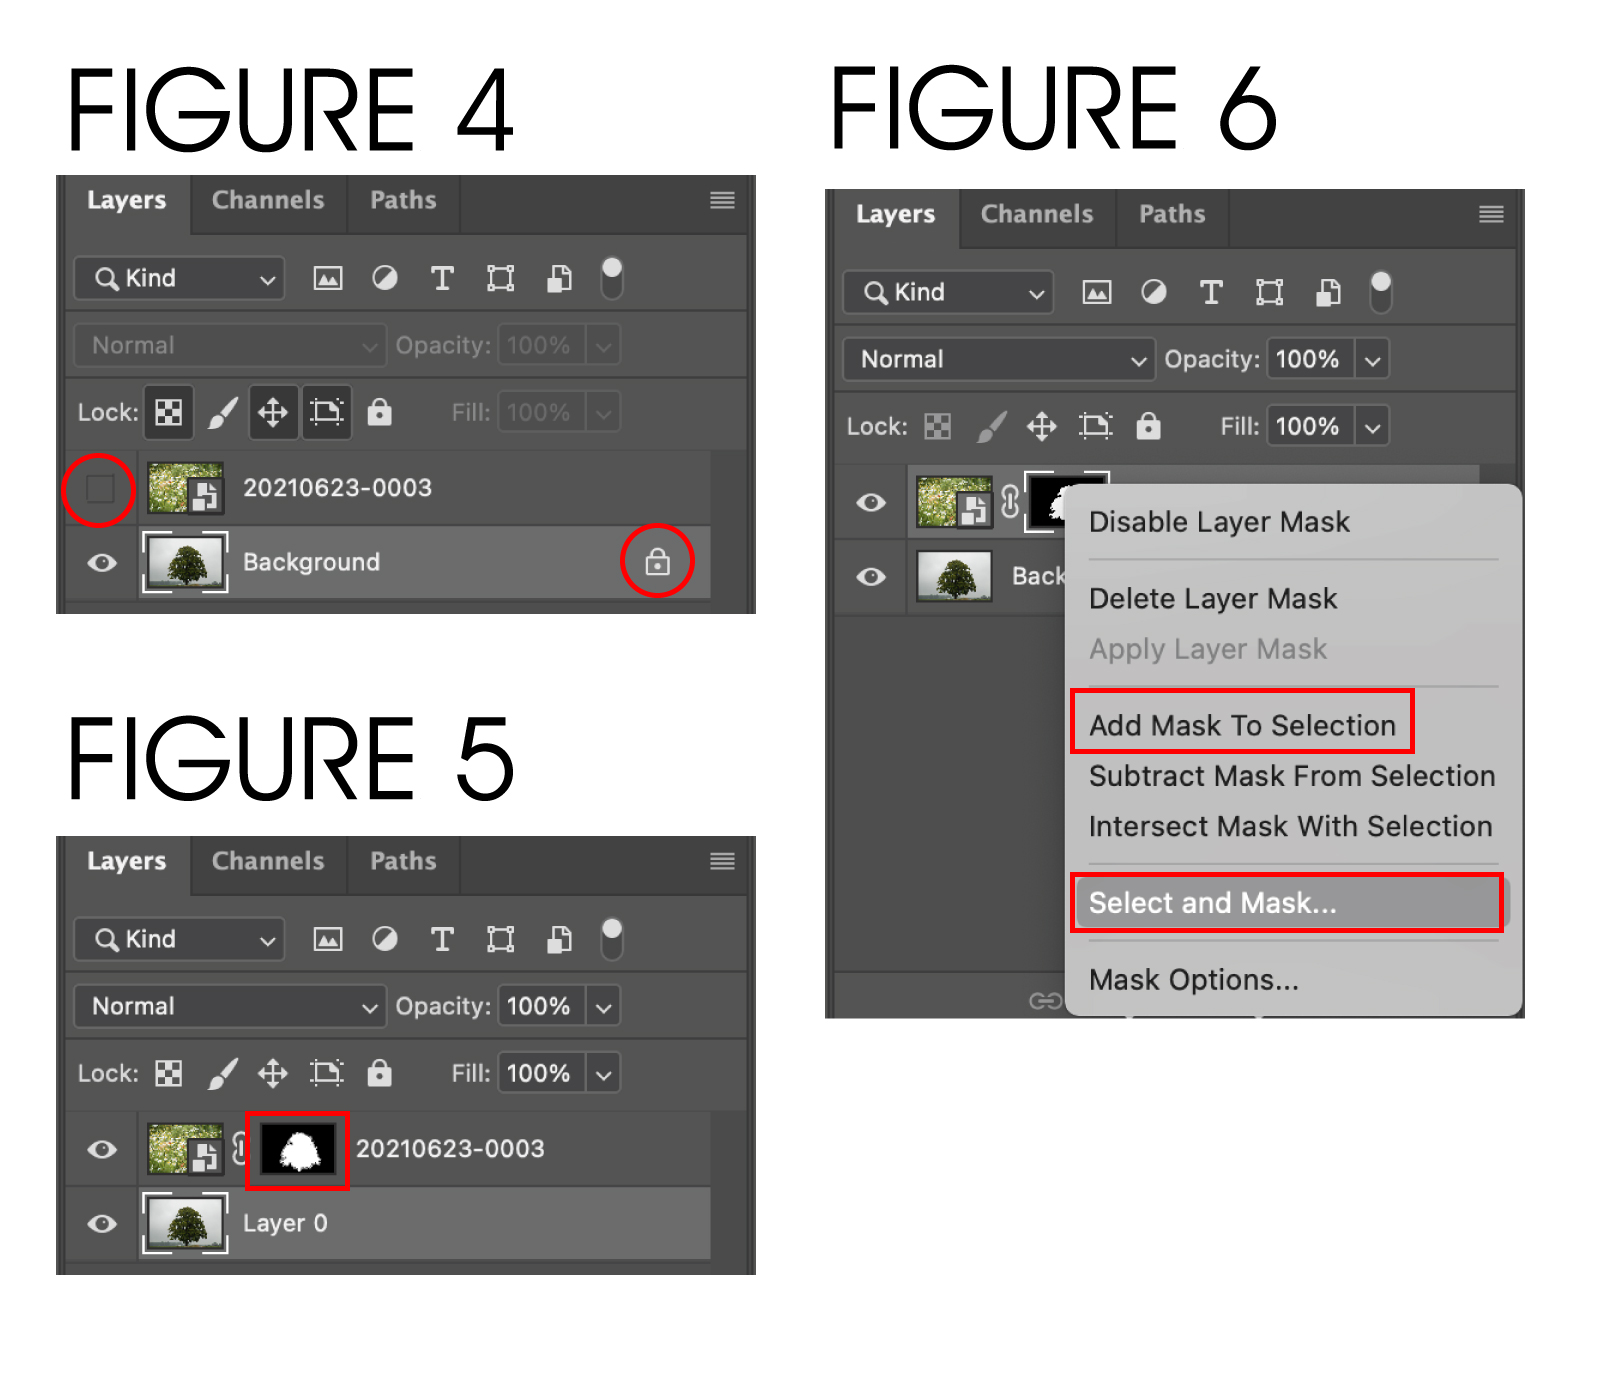
- Click on the padlock on the background layer so that it becomes layer 0 so that you can edit. Figure 4
- Click on the eye in the Layers window for the second photo, so it is hidden. Figure 4
- Make sure that you click on the layer to be masked.
- Click on the Object Selection Tool and select the object on the first photo (using the rectangle or the lasso)
- If you want just the object to show on the second photo then
- Unhide the second photo (click on the eye box) and select the photo layer
- Go to Layers menu > Layer Mask > Reveal Selection
- So now you have just the selection showing on your second photo. - Figure 5
- You will see that the edge of the mask is a bit harsh, so it is a good idea to right click on the layer mask and select - Select and Mask - Figure 6
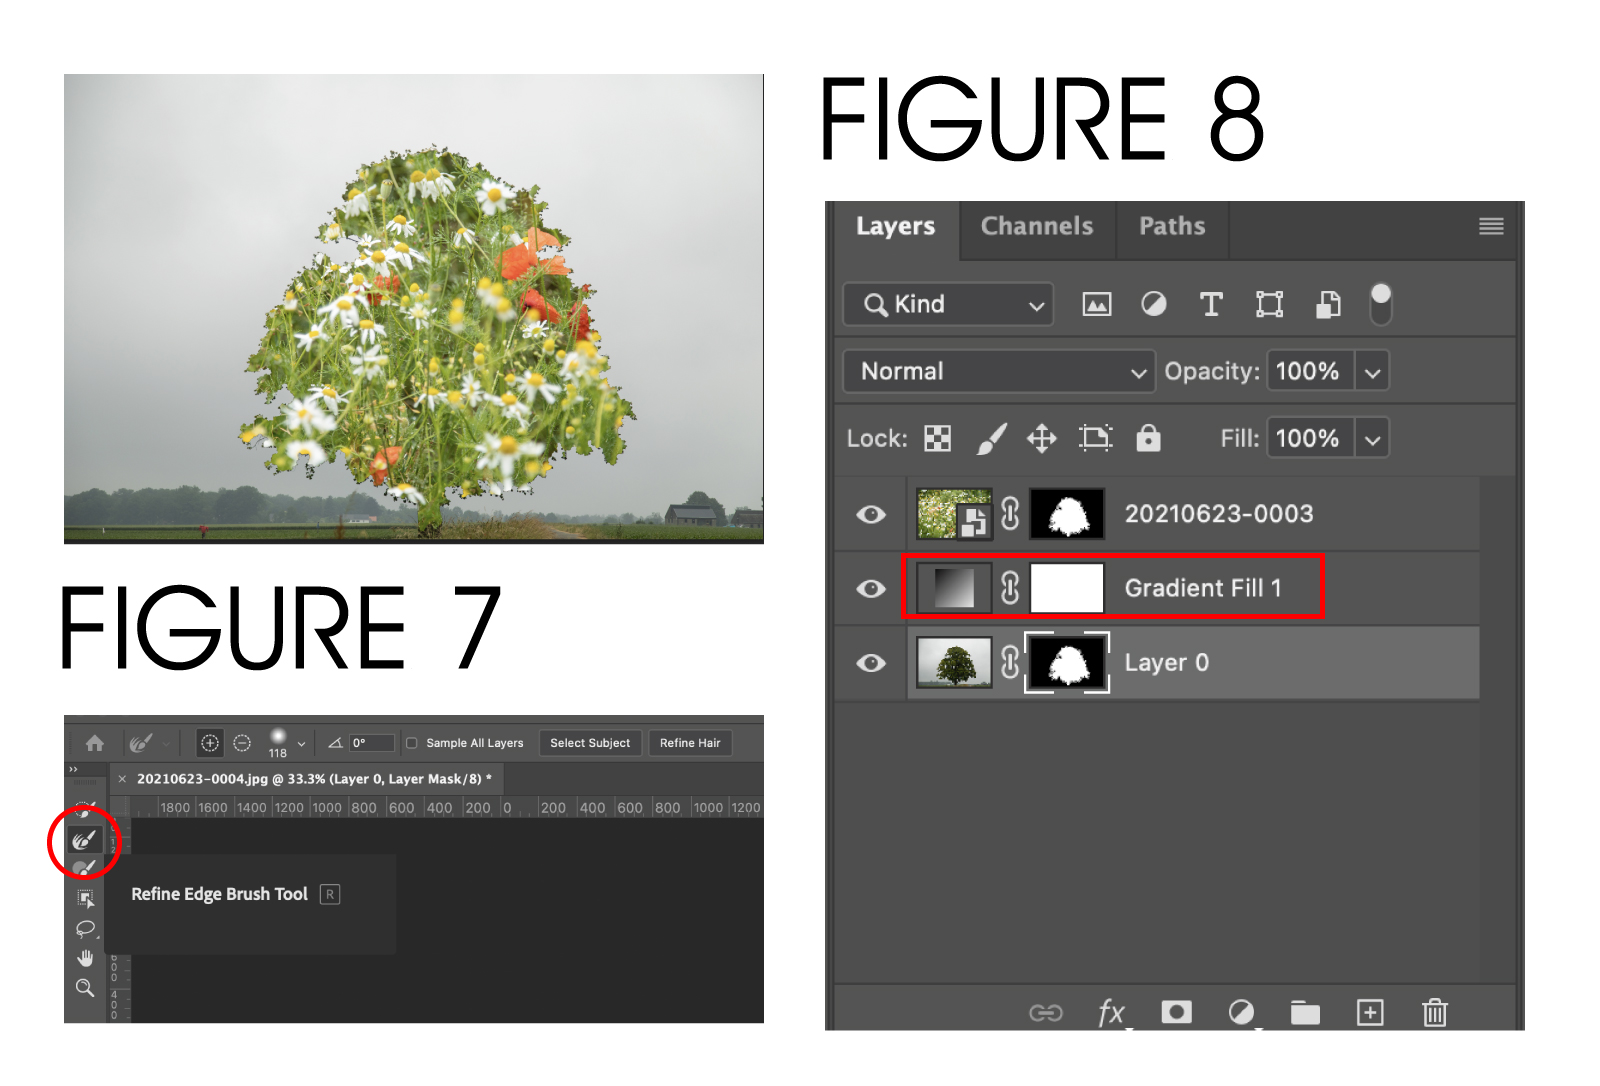
- A new window will open, and you can then refined your mask, I used the refine tool Figure 7
- Made the tool about 150px and also made the Edge Detection Radius about 5px.
Then basically you play with everything until you are happy,
I added a new layer underneath the second image to add an interesting background (I used the gradient window to add, also if you don't want it too bright just take the opacity level down. Figure 8
Save as above and you are done!
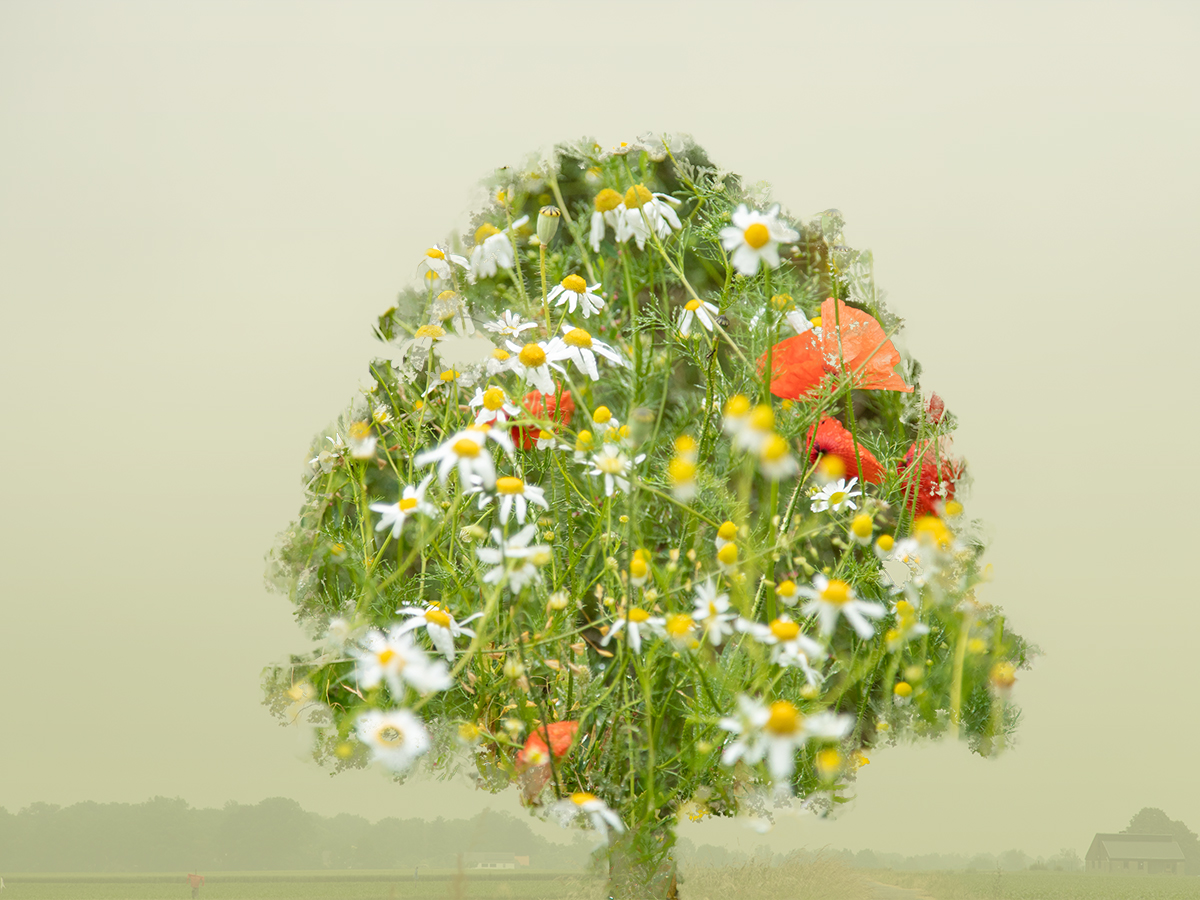
Completed image in Photoshop!
Double Exposure on your Phone
There are apps for that!
You can't actually take a double exposure on your phone, but there are many apps available, Image Blender (IOS), Blend Editor (IOS), BlendMe (Android) to name but a few.
You can also use Snapseed
Tap on Tools > Double Exposure and hit the first icon. Select the image and tap on Lighten as the blending mode (second icon). Drag the Opacity slider towards the left to adjust the transparency of the image. Stretch and rotate the image as you deem fit.
Have fun don't stress it, enjoy!