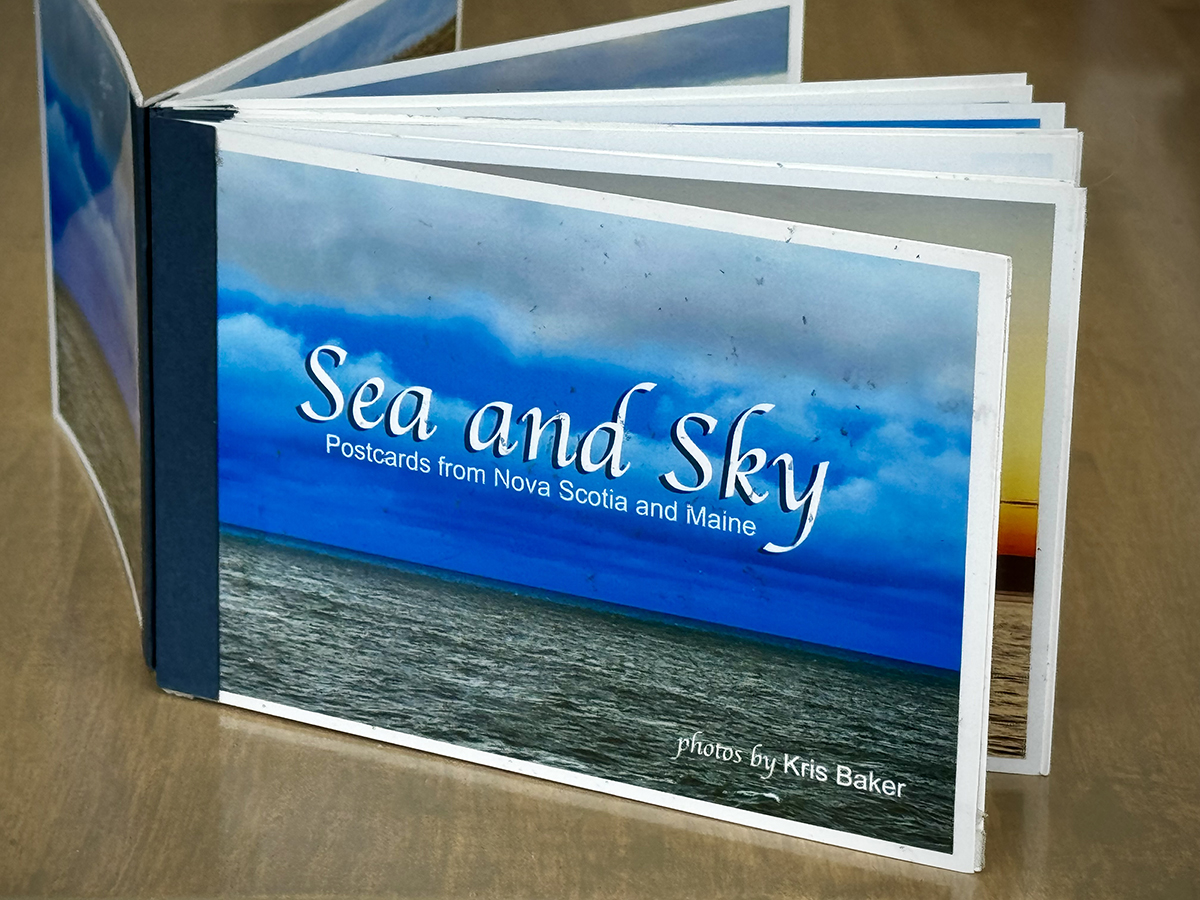
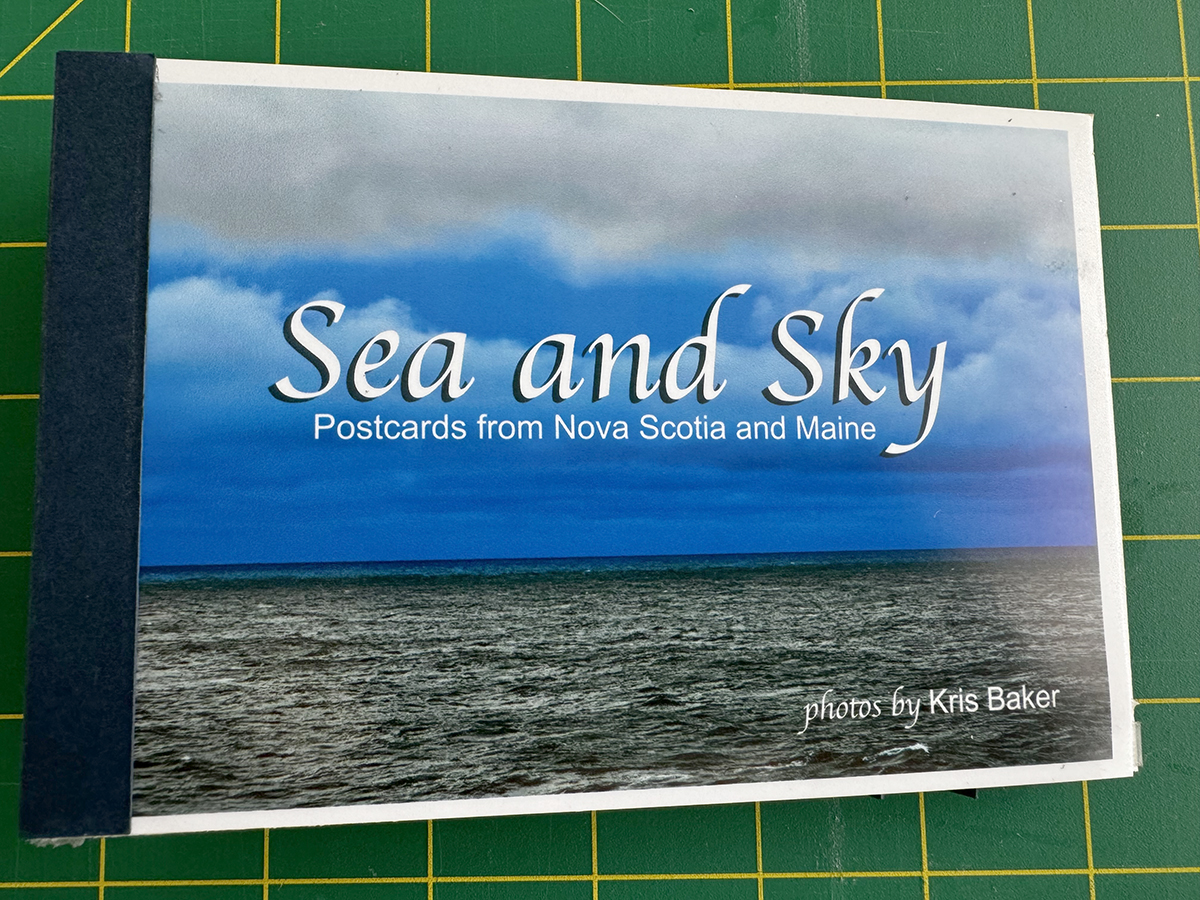
Have you ever found yourself in need of a quick gift and thought that a photo book would be perfect but you don’t have the time (or coupon) to put one together online and wait for it to be delivered? If so, this is a quick and simple solution…a photobook that you can make at home with a few basic supplies and a little time and patience.
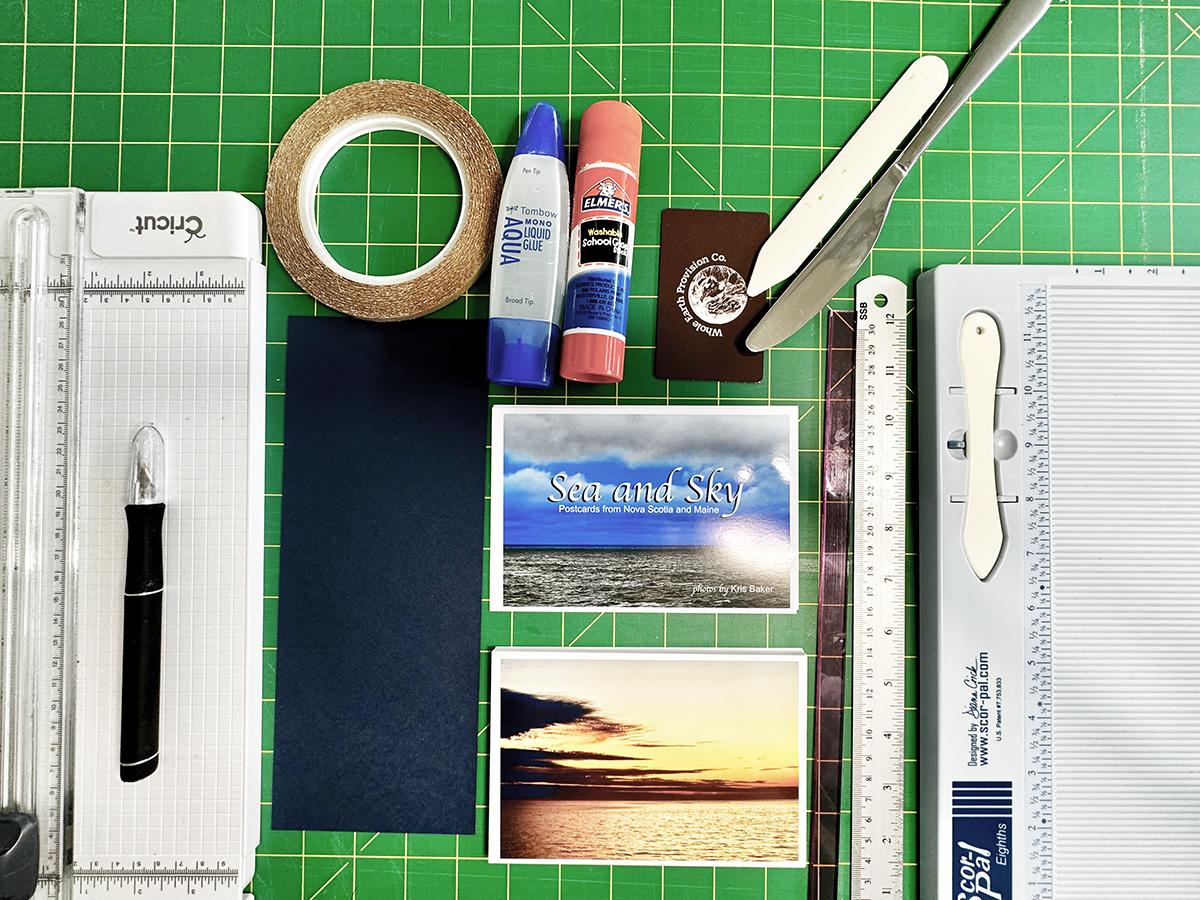
SUPPLIES NEEDED
- 20 4x6 landscape photos
- (I will tell you how to modify the size and number of photos at the end.)
- I printed mine at home on a regular printer, which helps with the ease of doing this project quickly. If you print at home, make sure to check the maximum paper weight (gsm) that your printer can handle. Not all photo paper is created equally.
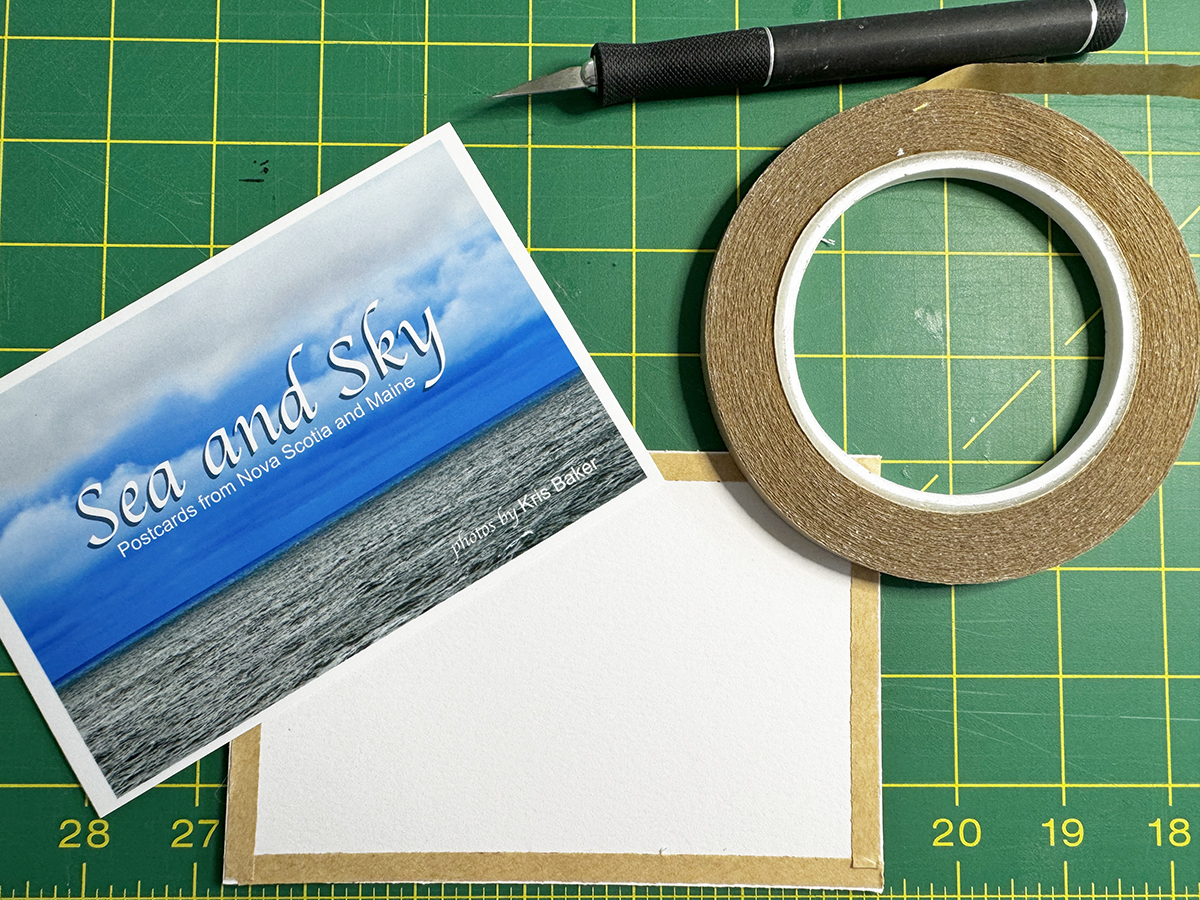
- Cover and back, both 4x6
- I used the same photo for my cover and back in the example, but you can be creative with your covers. If you don’t want to use photos, try your own artwork, scrapbook paper, a map, fabric…your creativity is the limit! Your front and back covers do not have to be the same.
- 2 4x6 pieces of cardstock or light cardboard (like a cereal box) to add some oomph to your cover and back. This will not be visible.
- Cardstock or heavy scrapbook paper - one 4”x10” piece
- This will be the spine of your book so a color and pattern will show somewhat. Choose a color that coordinates well with your front and back covers.
- A measuring device - ruler, cutting mat, quilter’s ruler, 1/2” template, or a scoring board.
- Measuring 1/2” segments is the most critical part of making this book, so accuracy is key!
- Adhesives - glue tape, double-sided tape, or glue stick, and liquid glue.
- Glue is my nemesis so I prefer to use double-sided tape or a glue tape runner like used in scrapbooking because it is easier to control and much less messy. You will need to use liquid glue in the final step in making your book.
- Bone folder, old gift card, or back side of a butter knife
- Any one of these things will do the trick. They will be used to help make your folds more solid.
GETTING STARTED
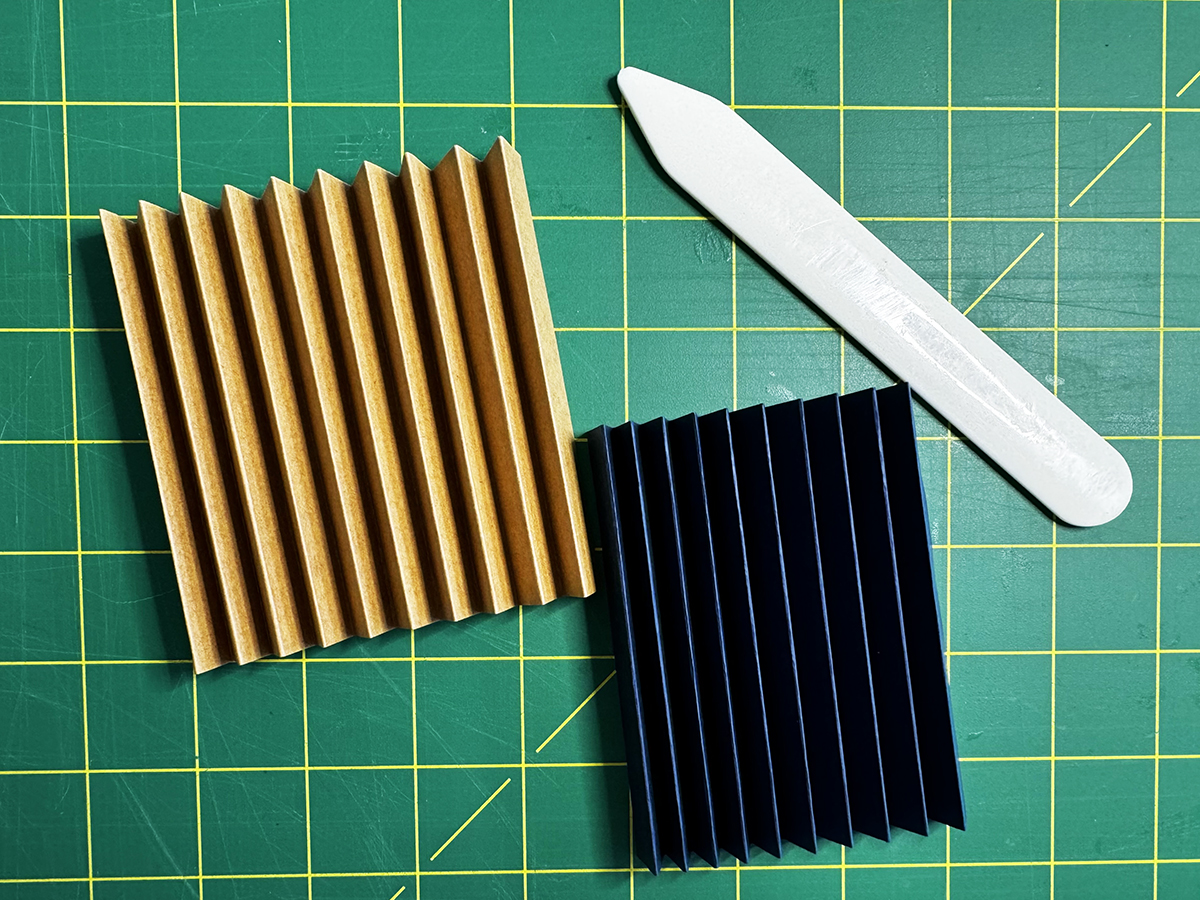
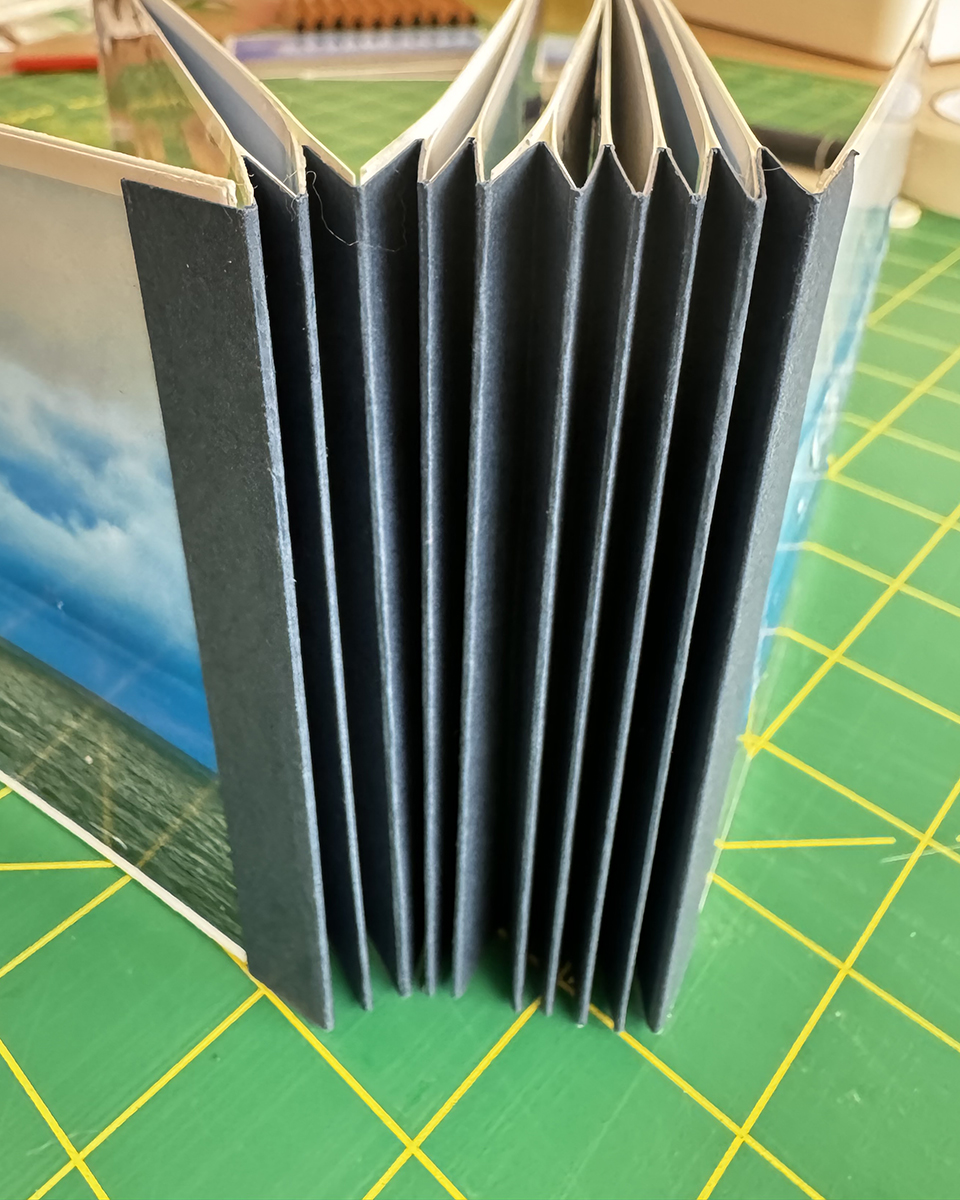
Making the Accordion Spine
The bones of this book are an accordion folded spine. For this step, you will need your 4x10 piece of cardstock and a measuring device. The goal is to divide this 10 inch piece of paper into 20 segments of 1/2” each. This can be done in several ways:
- Use a ruler and pencil and carefully draw lines 1/2’ apart across the entire 10 inches.
- Cut a piece of cardboard 1/2” wide and use it as a guide to draw your lines across.
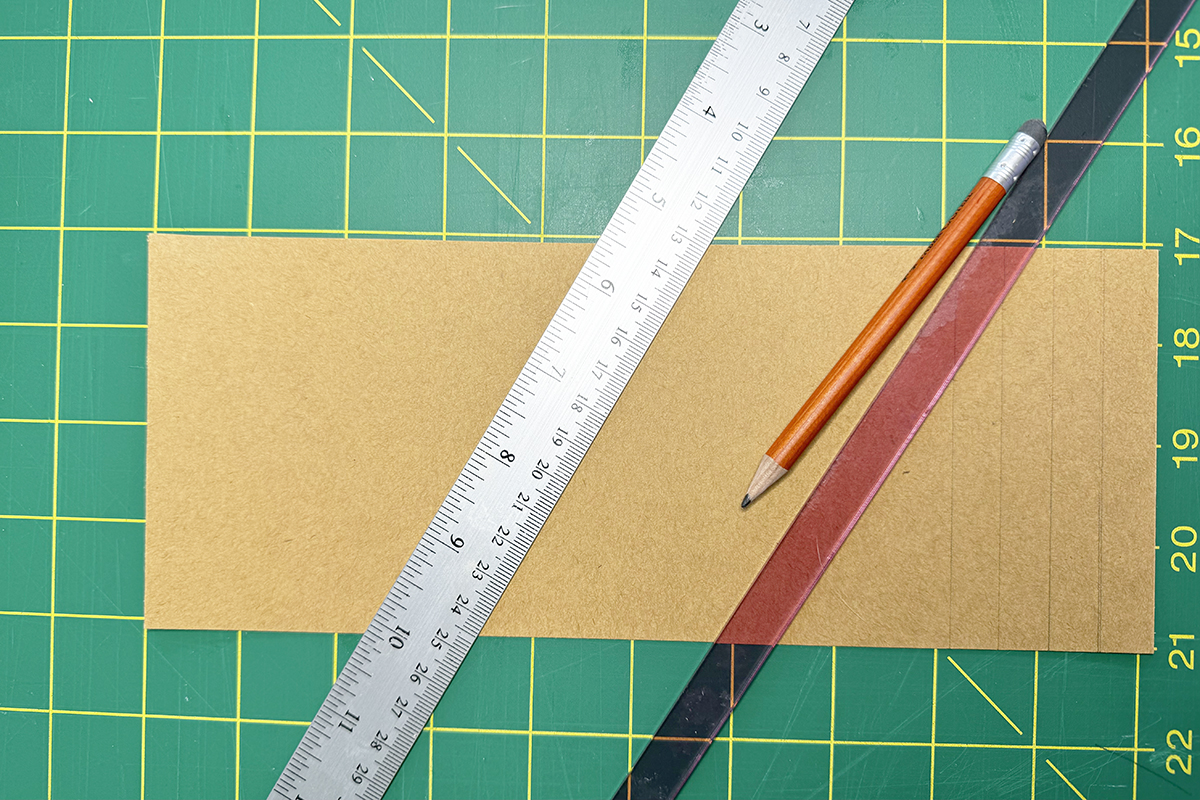
The pink acrylic piece in the above photo is my 1/2" "cardboard."
- Use a scoring board. This is the best way to get evenly spaced lines. If you enjoy making this book or are a regular paper crafter, a scoring board is definitely worth the investment! They cost around $15 give or take a little.
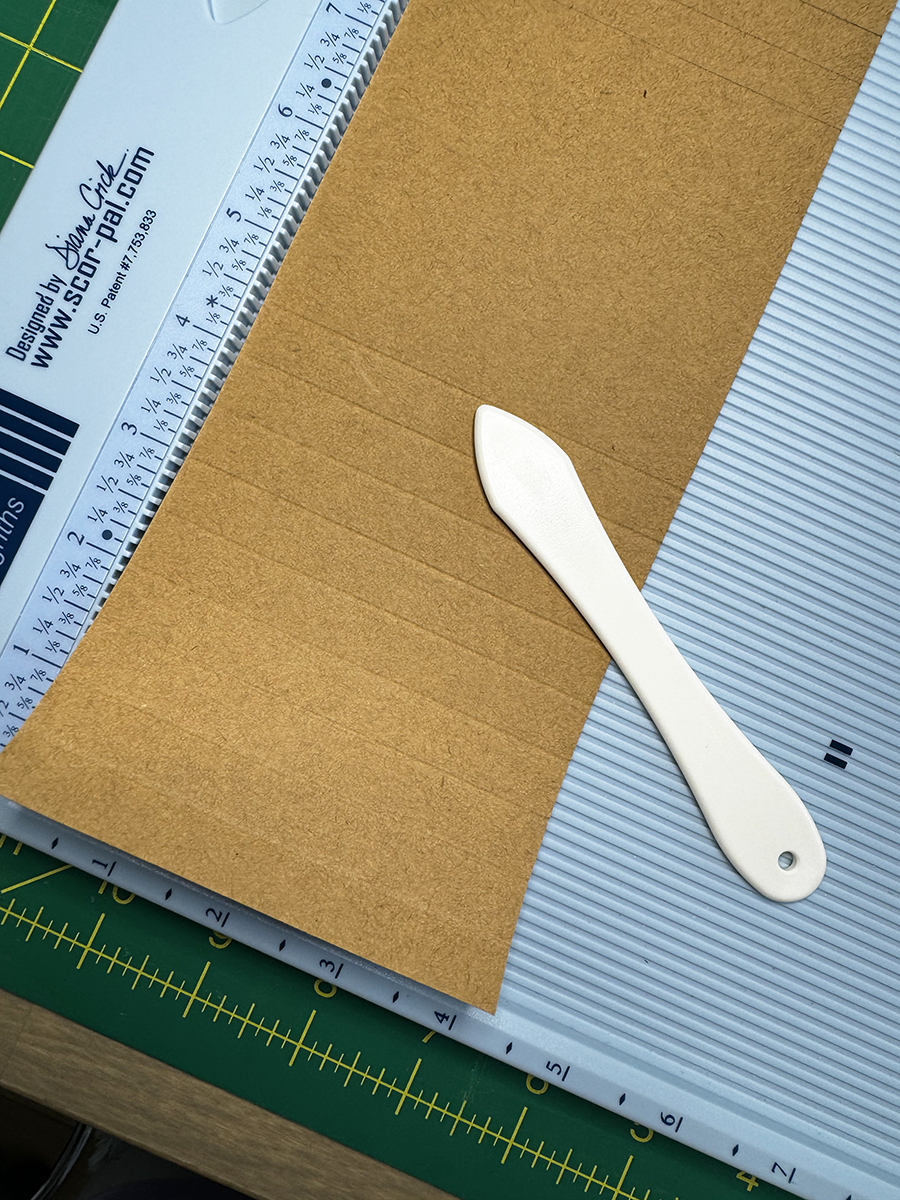
If you use methods 1 or 2 above, once you have drawn your lines, you will need to use a ruler and carefully run your bone folder, gift card or back of a butter knife along each line to score it. This will make it easier to fold the accordion. A scoring board accomplishes both measuring and scoring in one easy step.
Once you have scored your lines, you are ready to fold. Fold each segment back and forth like an accordion. Go slowly! As you fold each new section, match it up to the already folded piece. The goal is for your accordion to be as even as possible. If you find that it is not evenly, try folding in the opposite direction. Sometimes, this will help.
You may want to practice the measuring and folding technique on scrap paper before attempting the real deal. You can use printer paper or any kind of paper from the recycle bin to hone your measuring and folding skills. This really is the most important skill of this whole process and is worth the time it takes to practice.
Once you have completed your accordion spine, grab a couple bulldog clips to press the folds together or place them under a heavy book for an hour or so.
Making the Covers
You want to have covers that are a bit sturdier than your interior pages. To accomplish this, take your 4x6 cover image, either a photo or other decorative piece, and attach it to the plain 4x6 piece cut from cardstock or cereal box. Do the same for your back cover. It is easiest to adhere these with a glue tape runner or double-sided tape. You want your adhesive to be as close to the edges as possible.
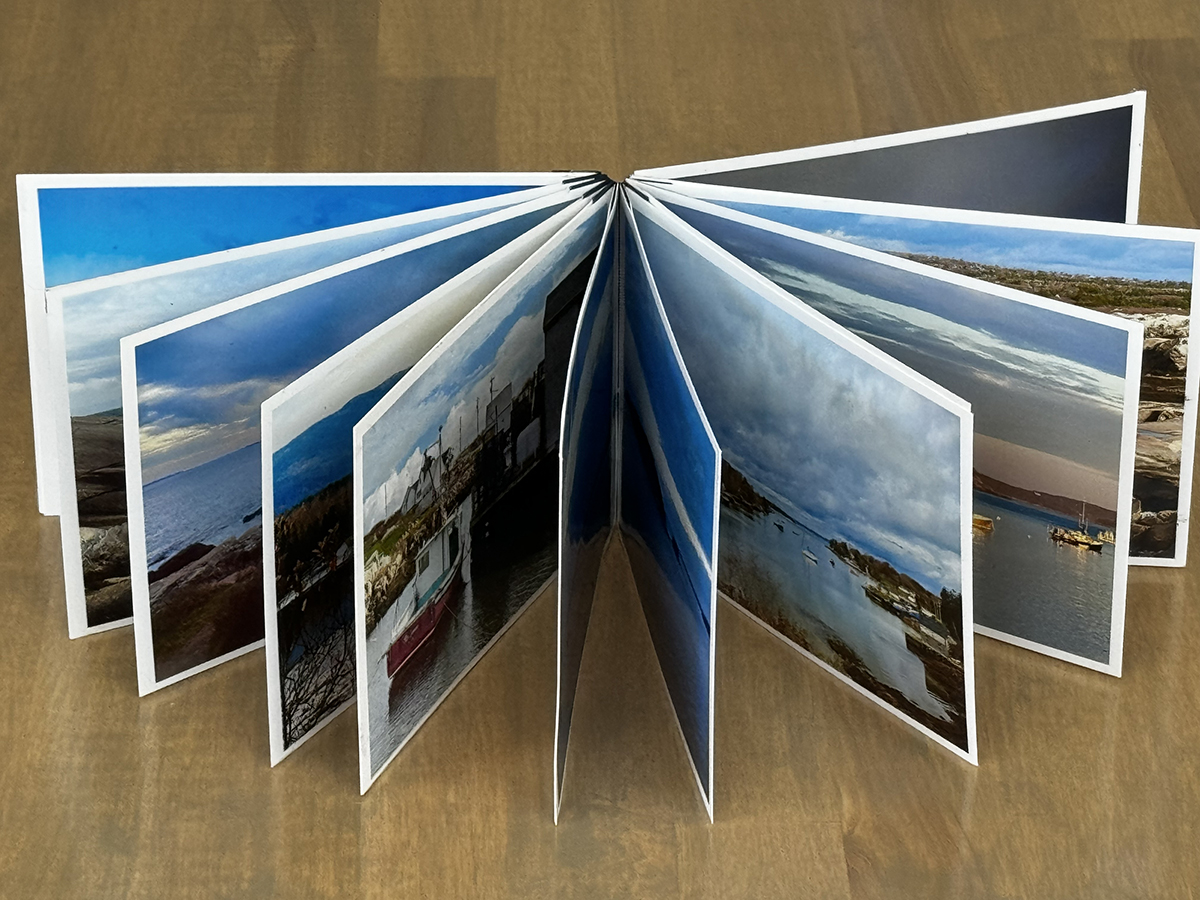
Attaching the Pages
If you choose to add a photo to the inside of both the front and back covers, you will need twenty photos. If, like in a regular book, you want these spots blank, you’ll use 18 photos and a blank piece of paper for the first and last pages of your book.
- Arrange your photos in the order in which you want them to appear in your book. It is helpful to write the page numbers in pencil on the back of each photo.
- Place your accordion spine with the “valley side” up, meaning that the fold on the left side should look like a valley rather than a mountain.
- Run a piece of adhesive along the left side of that left-most valley.
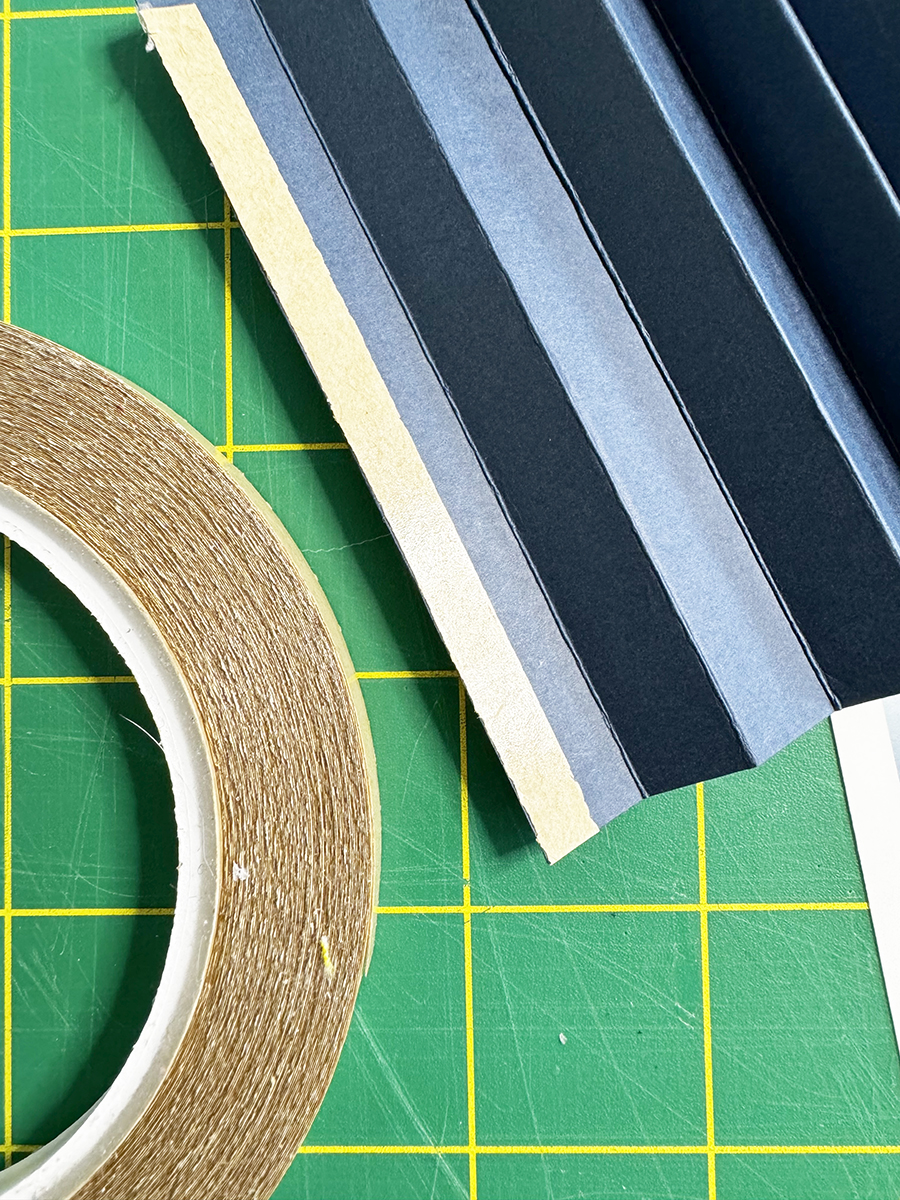
- Carefully attach your cover. Place the edge of your cover in the deepest part of the valley. make sure that your edges line up at the top and bottom and then press the fold onto your cover. The spine WILL SHOW on your cover.
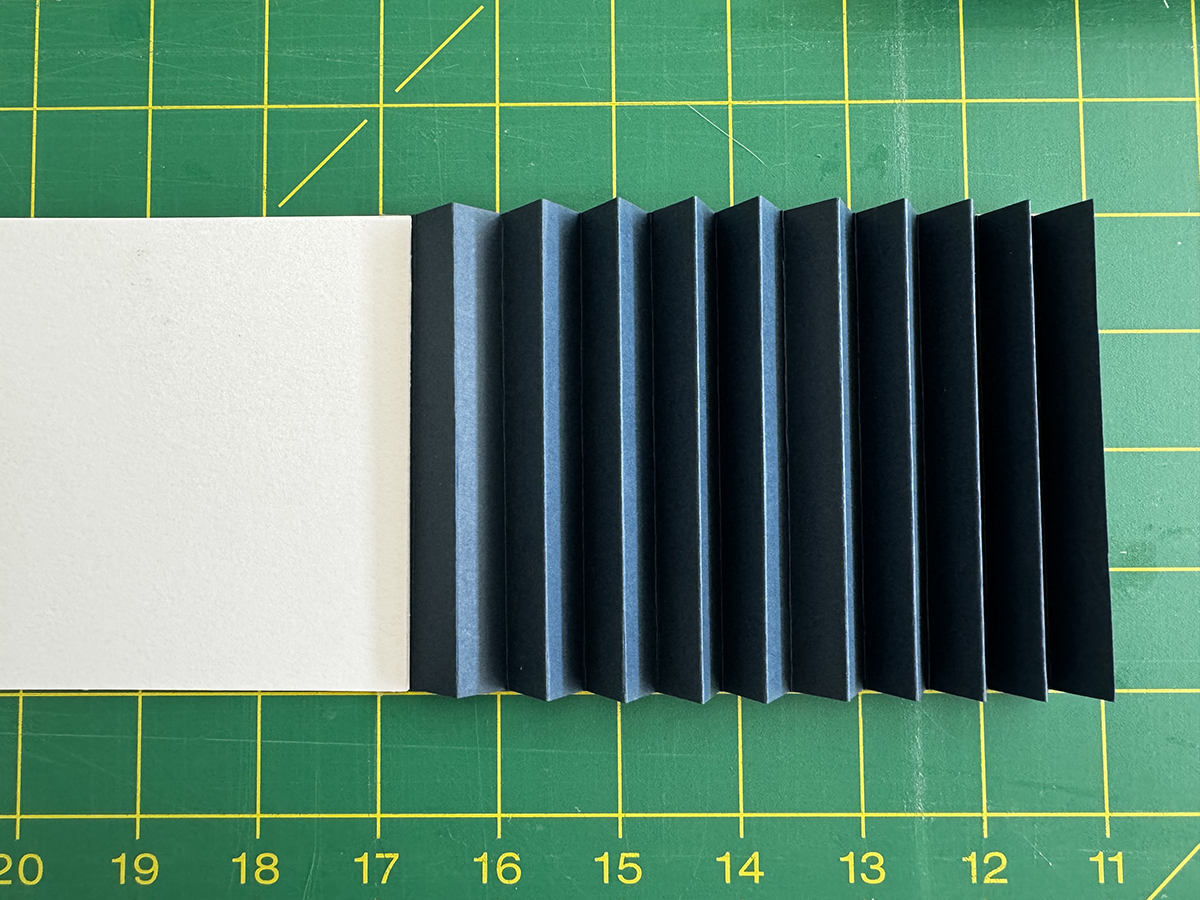
- Page 1 (Lefthand page) - Add adhesive around all four edges of the back side of photo page and a little in the middle. Stand it up in the same valley as your cover, line it up being careful to not let it stick before you are ready, attach it to the backside of your cover.
- Page 2 (Righthand page) - Place the page wrong side up and add adhesive ONLY to the right side of the page. Place the edge with the adhesive down in the same valley as page one and press the right side of the valley toward it, being careful to keep your pages aligned with one another.
- Repeat these last two steps until you have pages 1-19 attached. DO NOT ATTACH THE LAST PAGE YET!!
- Attach page 20 to your back cover. Then, attach this triple-layer piece as you have done for all other righthand pages. The spine WILL SHOW on your back cover.
You are almost done!!!
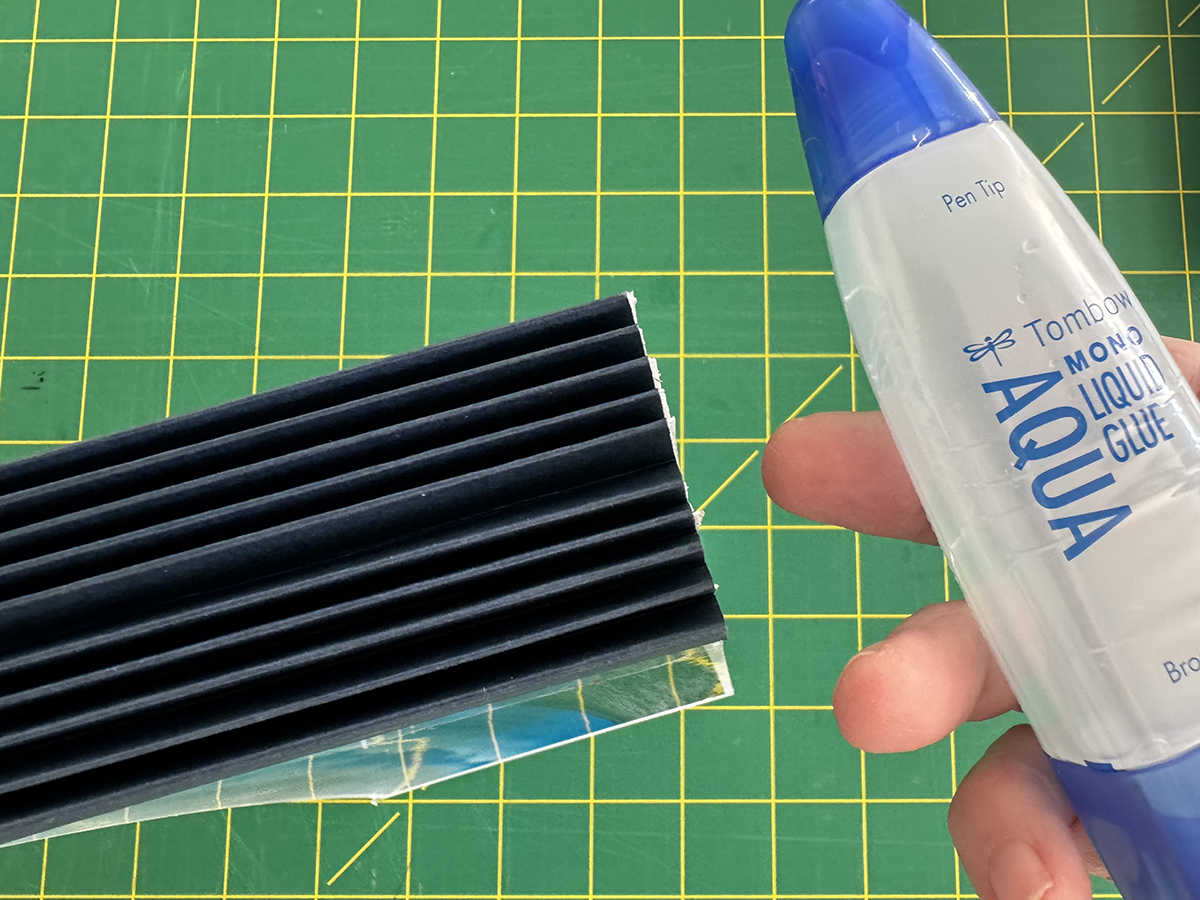
Closing the Spine
The last step is to pull the pieces of the accordion together at the spine. This is where you need to use liquid glue. I have found that Tombow Aqua liquid glue works best. It has a small hole and its consistency makes it easy to control. That said, any liquid glue that you have will work.

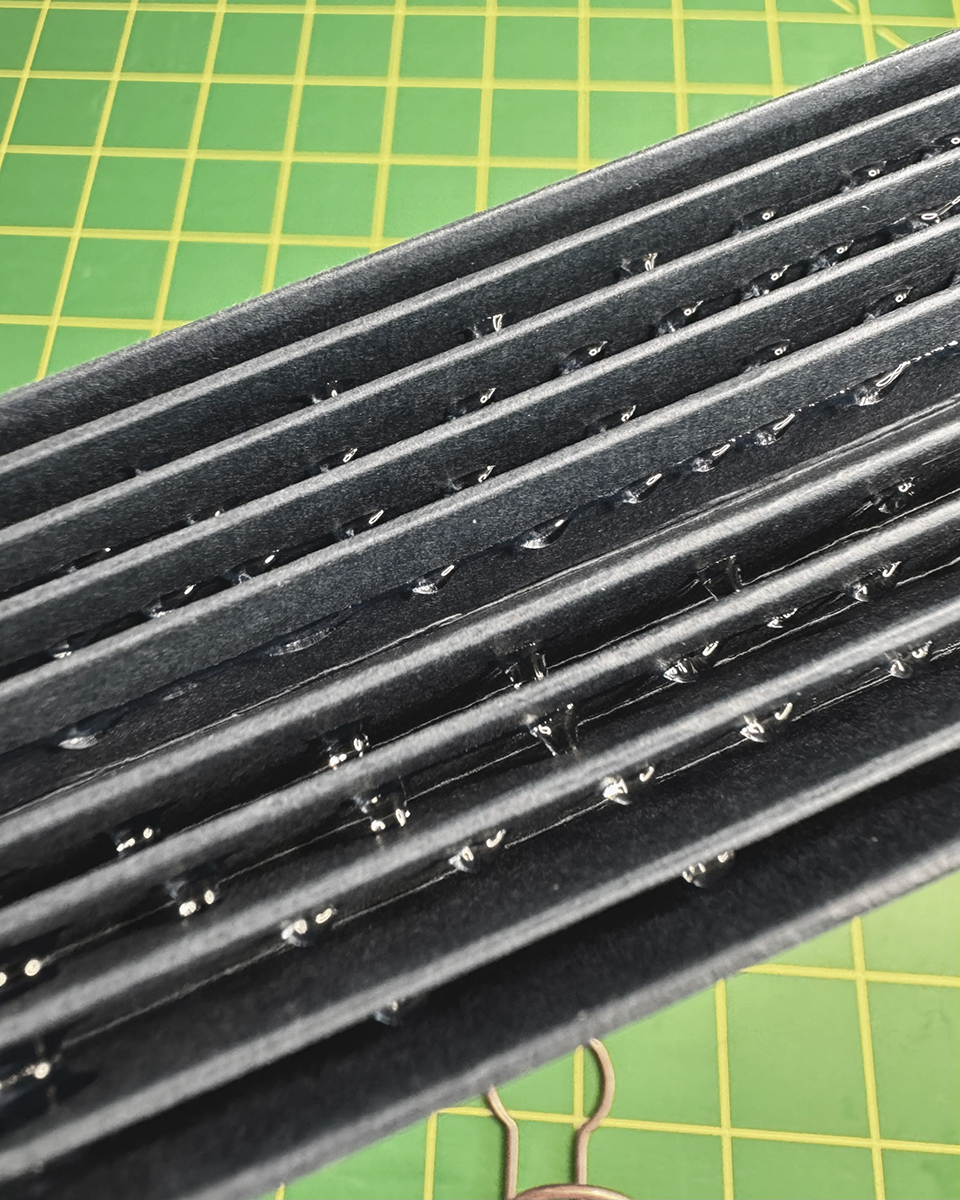
Add a beaded line of glue into each valley along the spine of your book. Place it in the middle of one side of each valley and don’t go quite to ends. Once you have glue in all of your valleys, use bulldog clips to press all of the folds together. Wipe away any glue that may have seeped out. Leave your book in the clips until they glue has completely dried.

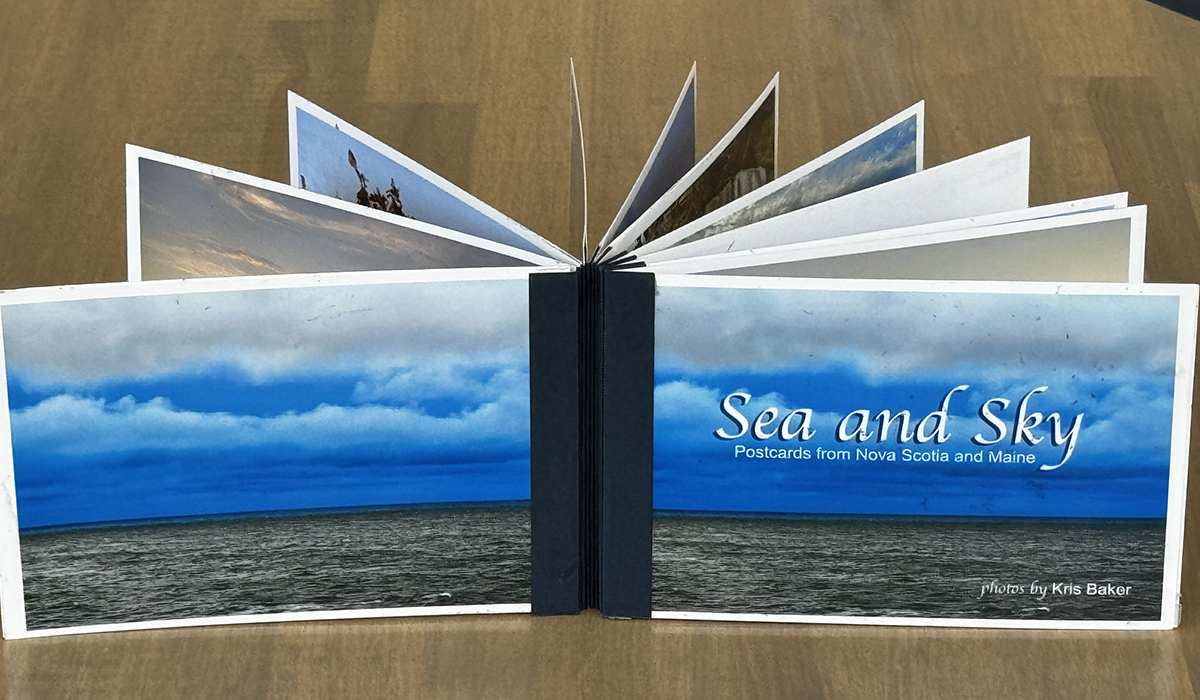
And that’s it. You made a photo book!
These are the basic instructions.
There are so many ways that you can customize this and make it your own:
- If you want to change the size of your book, the basic formula is: the height of your spine paper is the height of your largest photo and the length is a 1/2” for each page. So eight pages would be 4” or 24 pages would be 12”. etc.
- If you want to use photos of different sizes and orientation, you can make your book with cardstock pages and then attach the photos to the pages.
- You may want to add pages for journaling or quotes. Again, use blank cardstock pages or, if you don’t want to cut the pages, use 4x6 index cards.
- This technique can be used to make blank journals as well. Use a photo only as your front cover and then use index cards, multimedia or watercolor paper for the interior pages.
- Be creative with the covers. Almost anything goes!
- If you are giving your book as a gift, wrap a pretty ribbon or piece of string around it and attach a tag.
- Most importantly, have fun!
I hope you'll have a couple hours to give this a try. If you have any questions, please feel free to reach out to me.