When you are participating in a 365 photo project, there are some days that you will have to face a still life or flat lay prompt. Some photographers love them and some hate them! I know it can feel overwhelming and even a little intimidating. There are many assumptions and questions we have when we see a beautiful still life photo in the gallery created by the talented photographers in our community. You may be thinking some of these things:
Where do you find the light, especially if you work until after dark?
Isn't it expensive to buy props and set-ups?
What if I don't have good natural light at my house?
What if I don't have any space to set something up?
Today I'm going to take you behind the scenes (with help from a few of 365 Picture Today's talented still life photographers). I believe after you see our set-ups, you might be encouraged to try still life photography with more confidence.

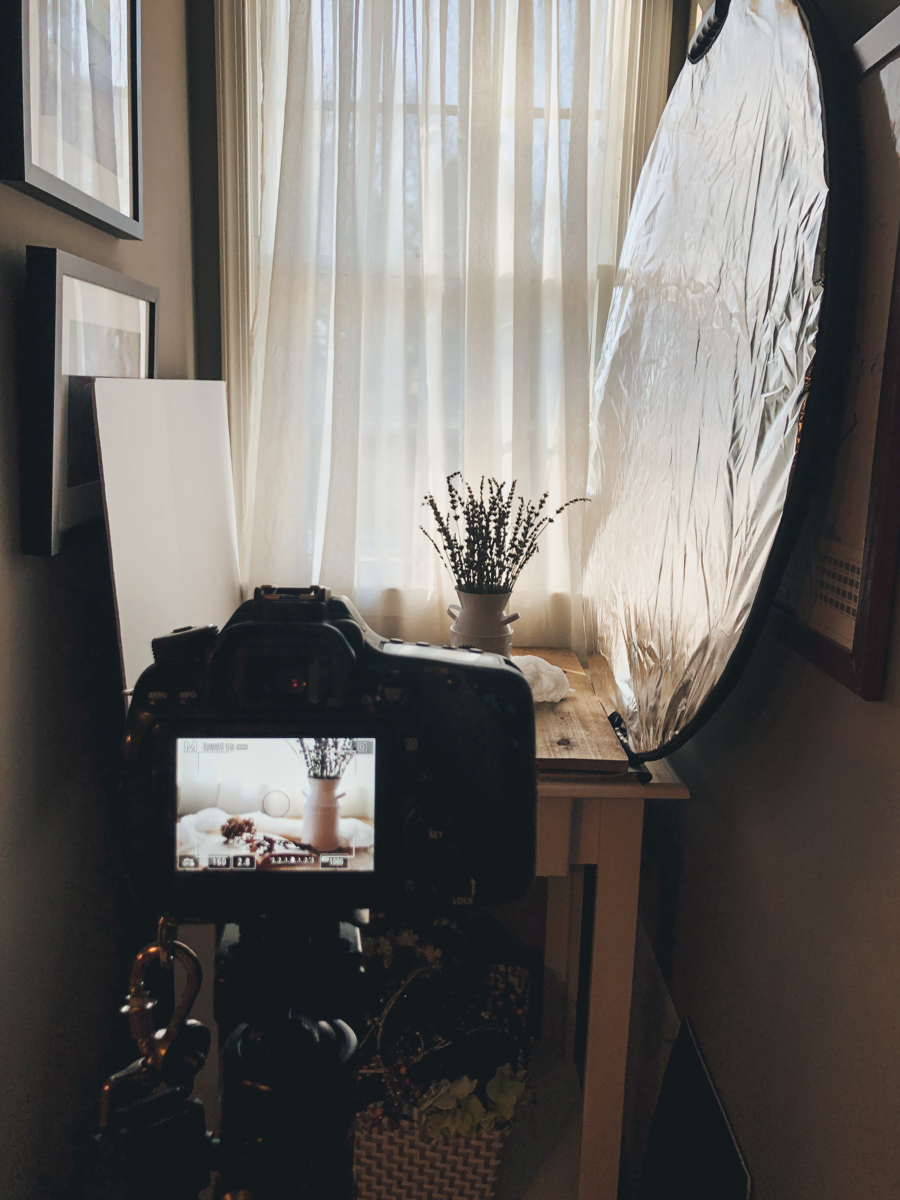
The image above was created in my still life space. It is a very small nook under the dormer window in my craft room. I realized it had amazing natural light so I have claimed it as a dedicated still life studio of sorts. Very simple and taking up no extra room. My hubby built a small table that I use and I have some inexpensive backgrounds. Below is a photo of the actual space. As you can see, nothing fancy at all. I like the backlight through the window and I typically use a reflector and some foam board to direct more light onto my subject.
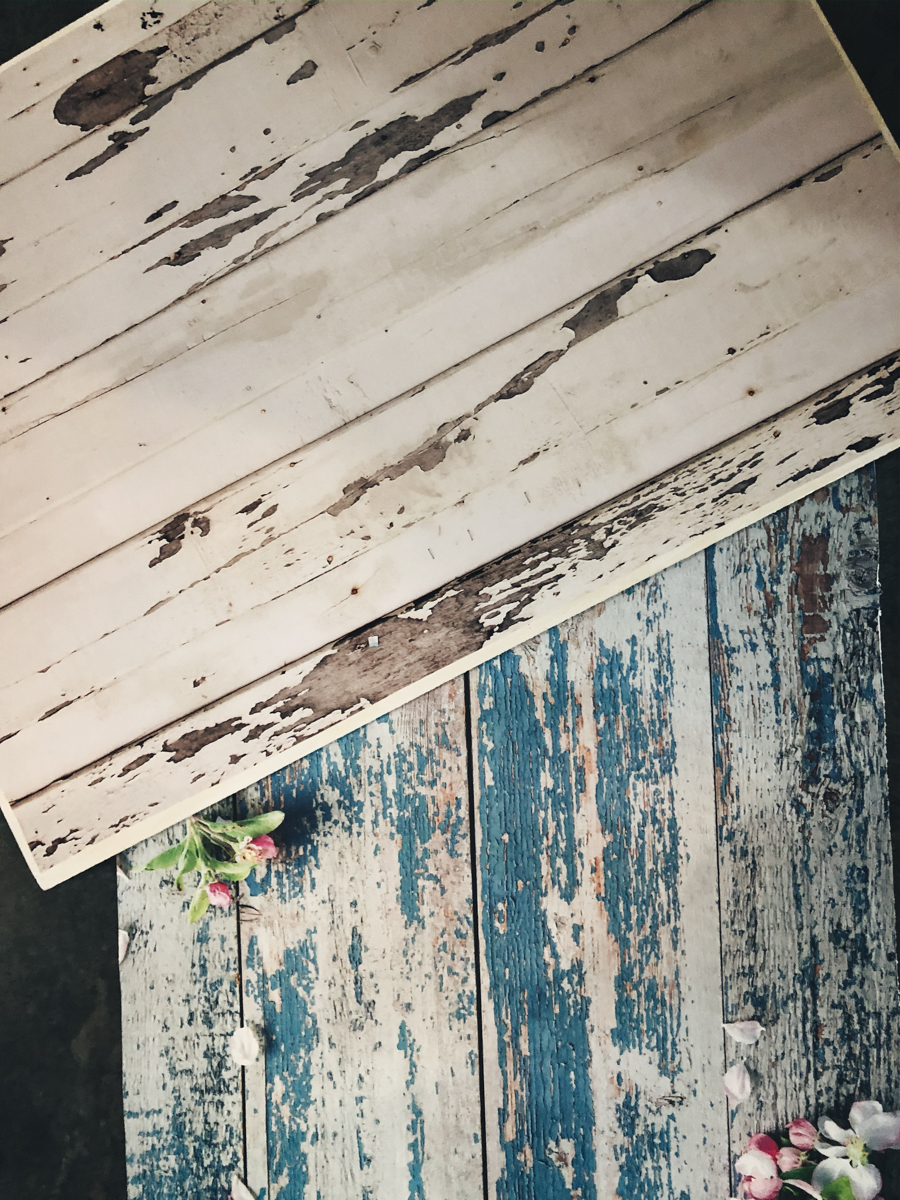
I have a few different surfaces that I typically use. Let me share with you my secret for an inexpensive version of a surface you would normally purchase for $75-$100. I purchased some vinyl surfaces on Amazon, made by KonPon. I paid $12.50 each for them. They are reversible but I was only interested in one side of each. To keep them from rolling and buckling, I attached the surfaces to foam board using contact glue. For a total of $15.00 for each surface (the vinyl plus the foam core), I created two portable surfaces that would have cost much more had I purchased from another company.
Janice Johnson, one of our community's still life superstars, shares her behind the scenes set up for us. The photo below is a beautiful example of the photographs that Janice creates. They are light and airy and soft and lovely. Her still life photography is consistently inspiring. Her use of light and texture elevates her photography.
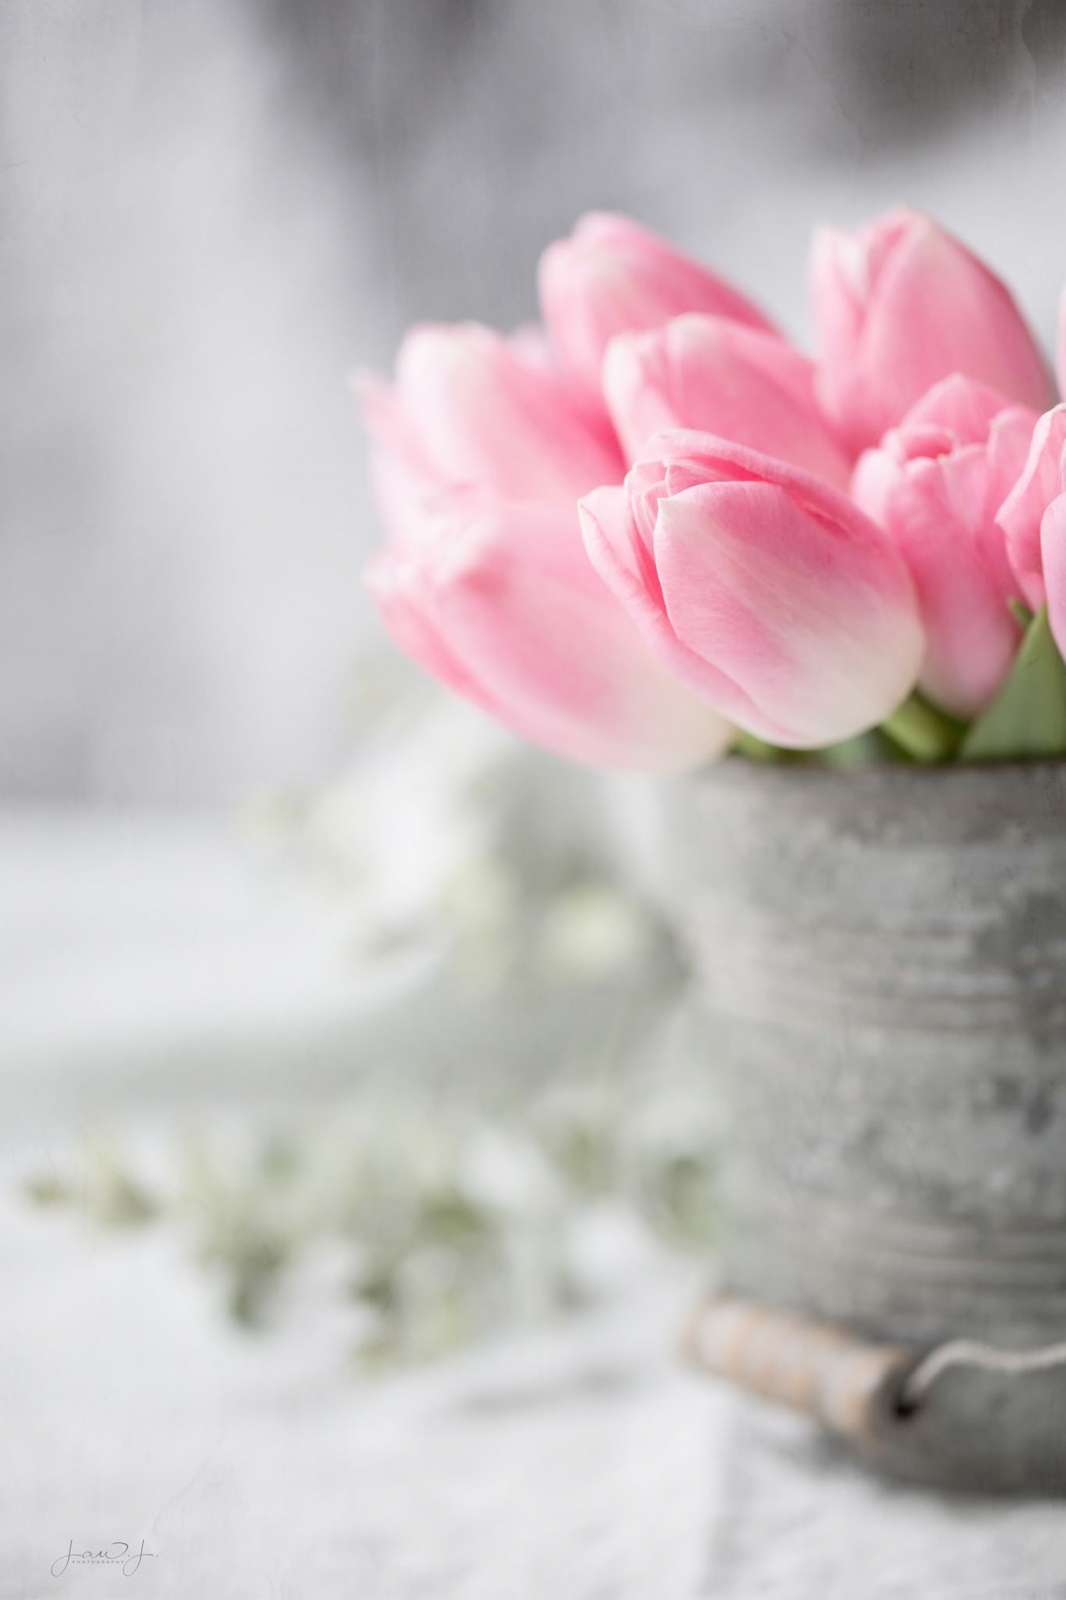
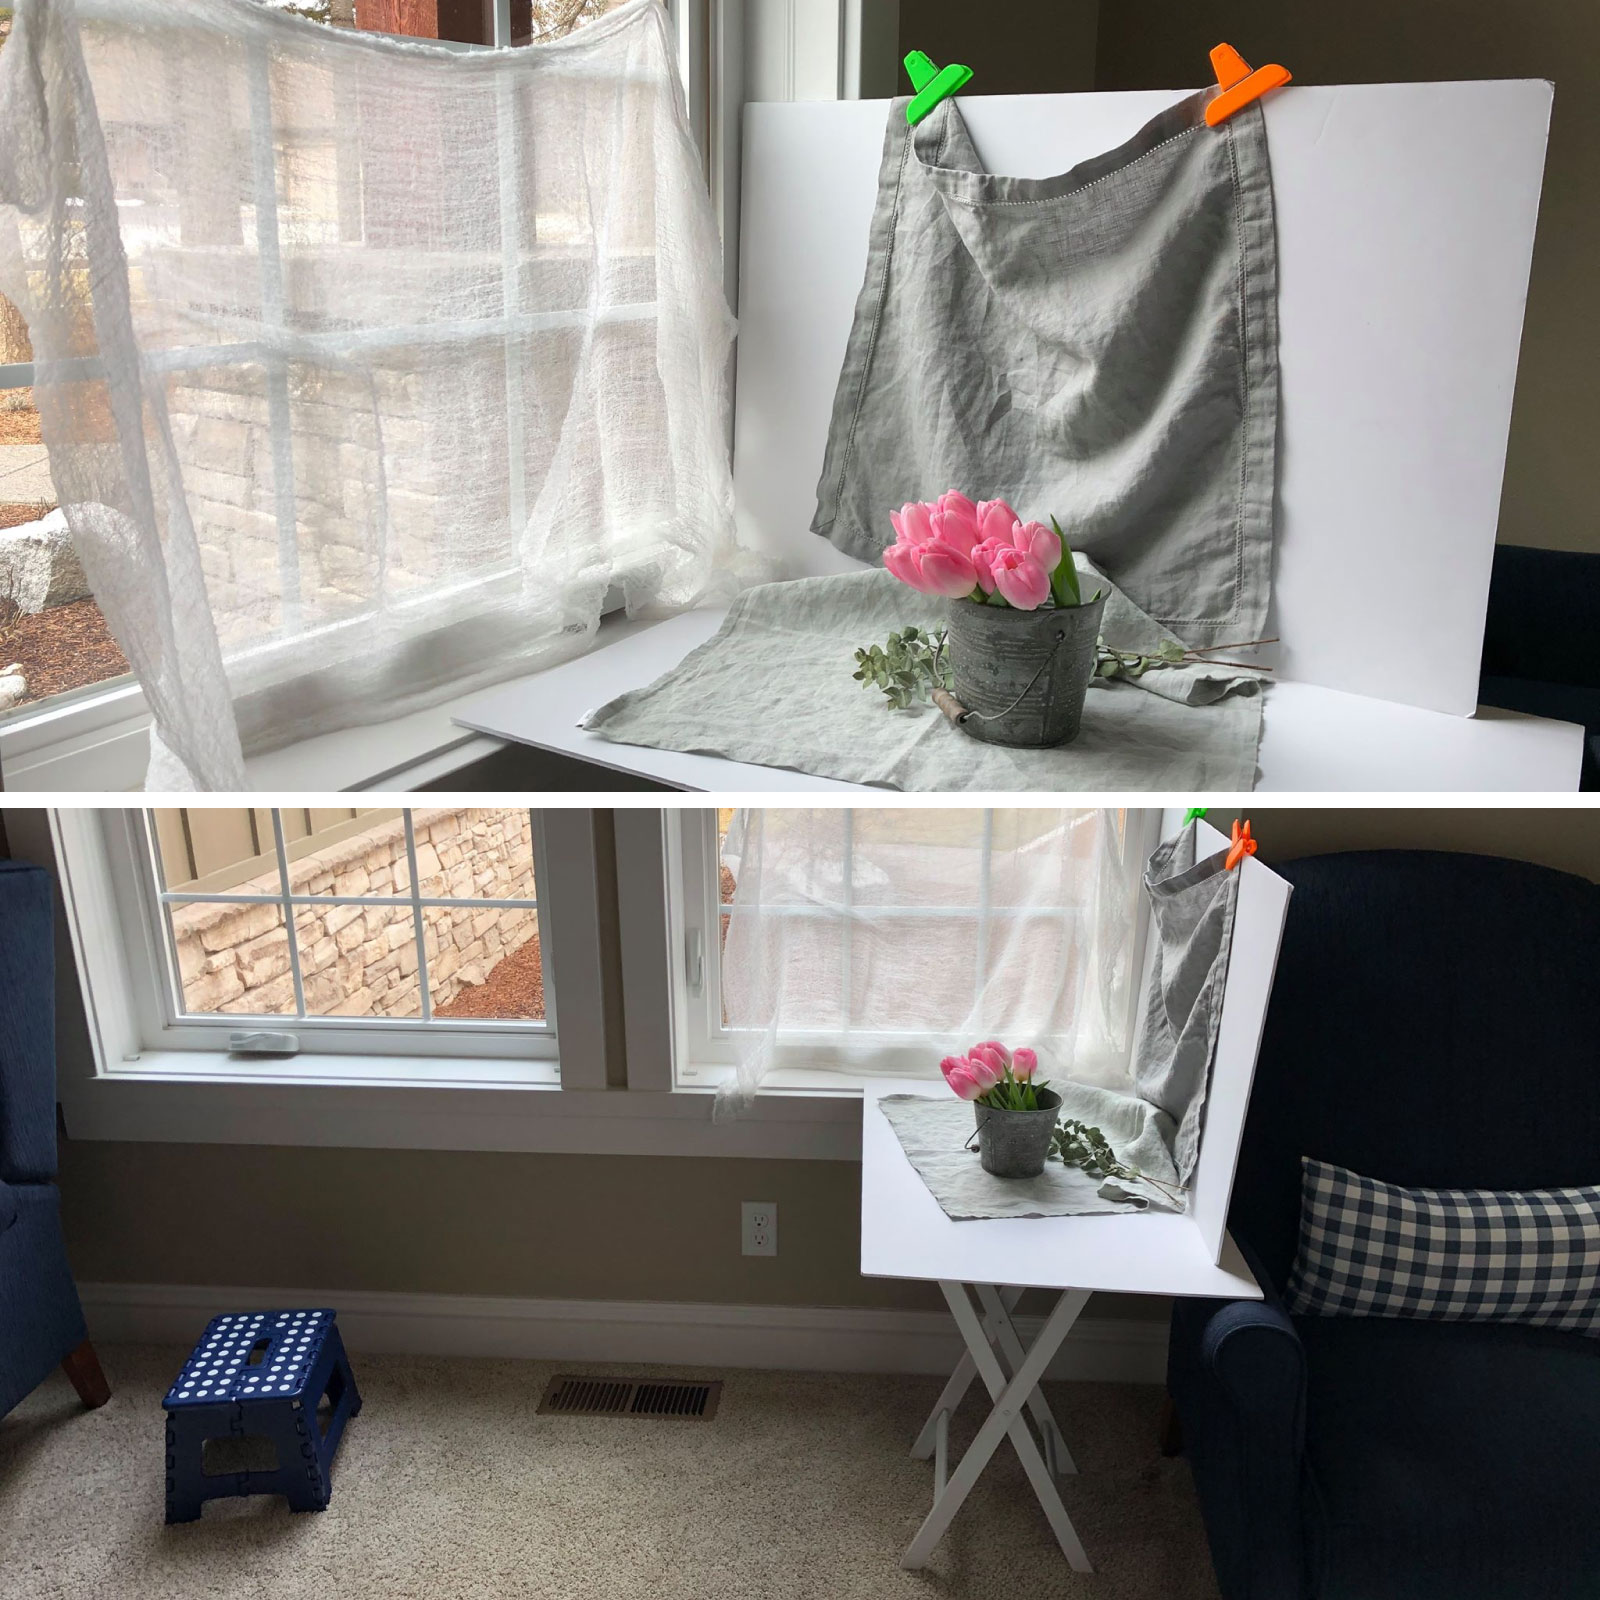
You may be surprised when you see the set-up that Janice used for this gorgeous photo...
Supplies:
- 2 white boards
- 2 linen napkins
- 2 chip clips
- 1 piece of cheesecloth (taped to the window)
- A little patio table.
Janice also includes a step stool that she sits on this so that she can shoot straight in.
Her settings were: ISO 1000, SS 1/320, f2.8.
Isn't it amazing what she creates using everyday items?
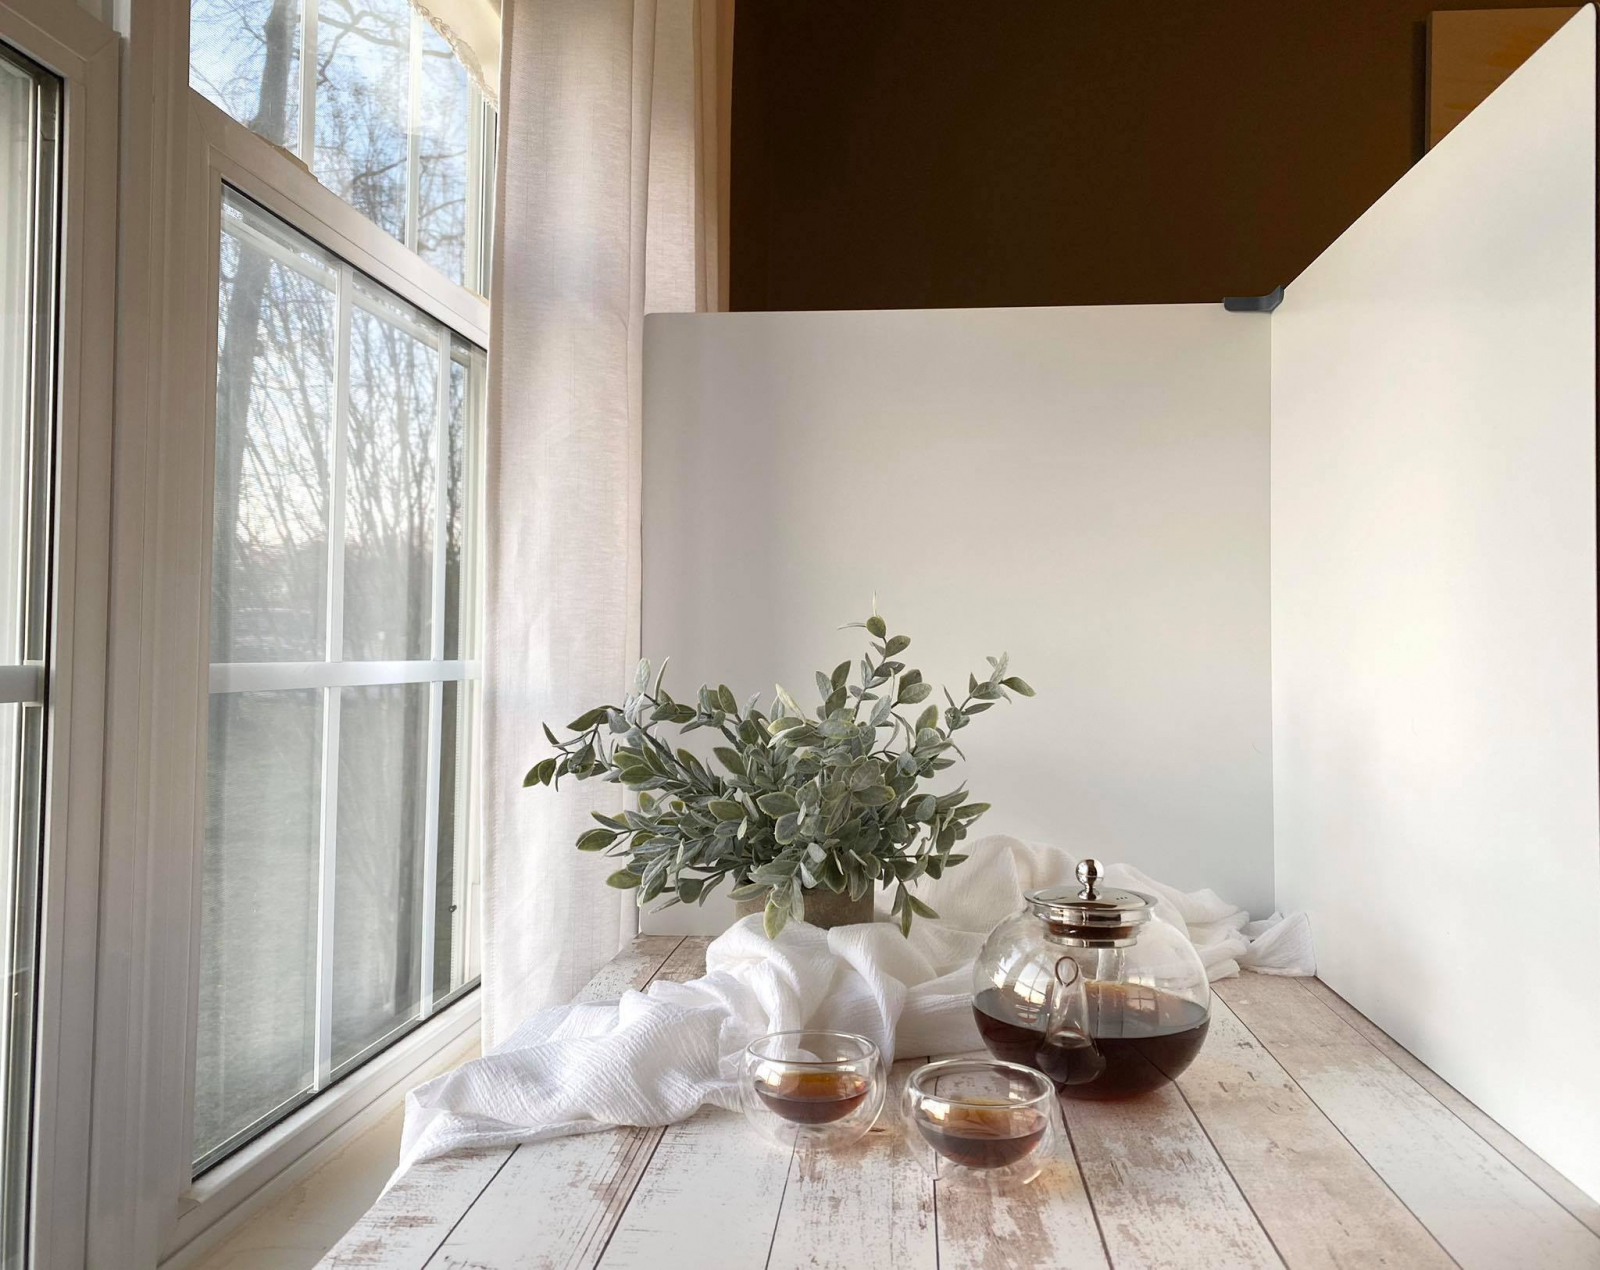
Another popular light and airy photographer in the community is Lori Rowland. Lori's images are so soft and pretty and the light is captured beautifully. Here are three images that Lori has created with the same set-up but photographed at different angles.
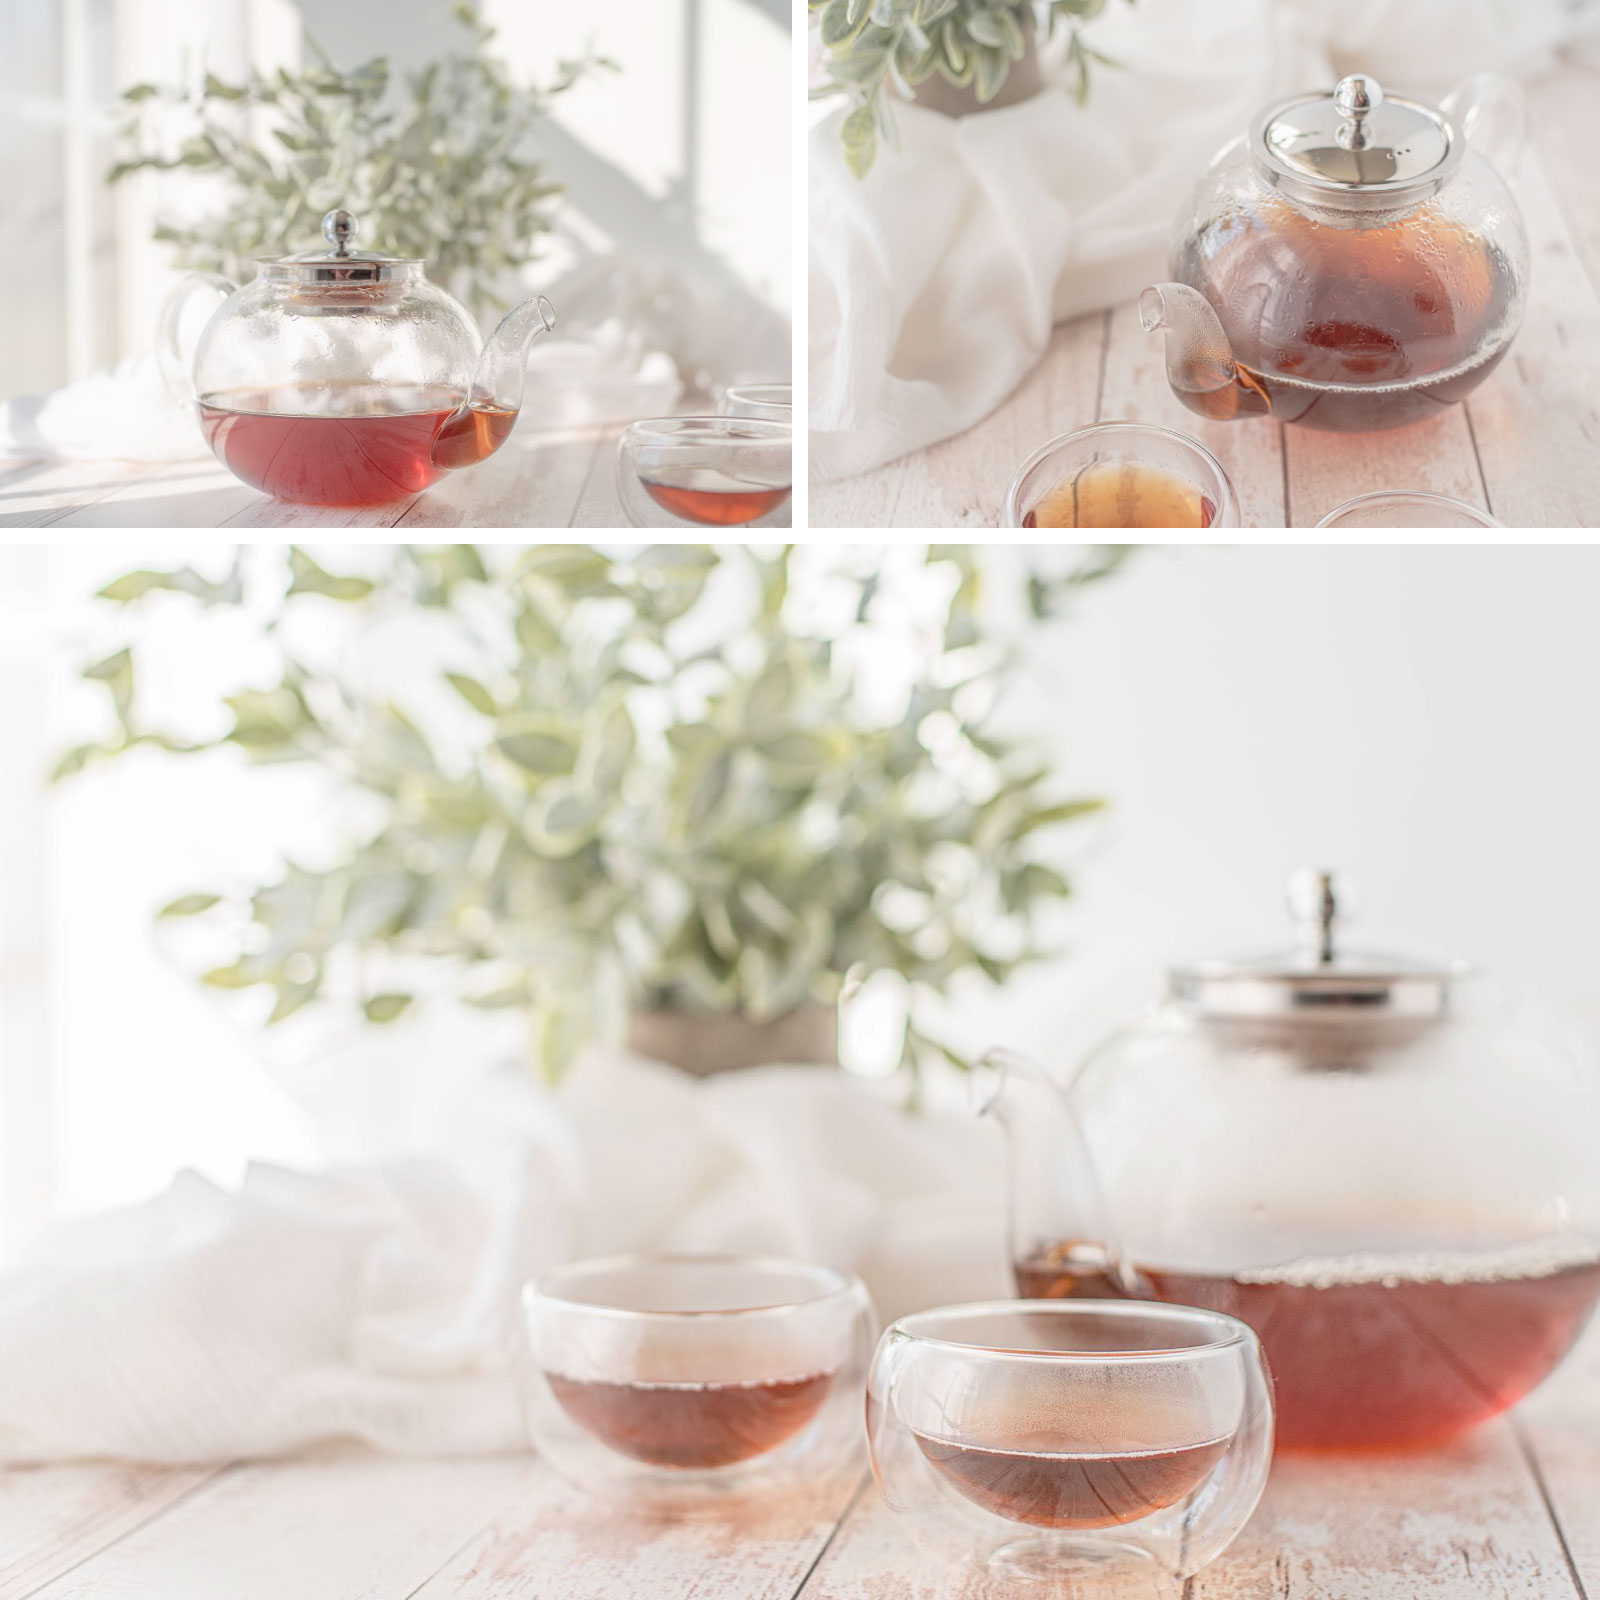
Lori shares her set-up that she used to create these lovely images. She uses natural light to her advantage. Lori normally sets up in her bedroom in front of the window. In order to reflect the light, she uses a white surface behind and on the right side. For these photos, she used two Replica Surfaces backgrounds, but white foam board also works well. After taking the shots, she edits in Lightroom, mainly tweaking things such as highlights, shadows, contrast, and blacks. She also likes to add a little bit of haze to soften the photo a bit.
That's it! Not too intimidating, right?
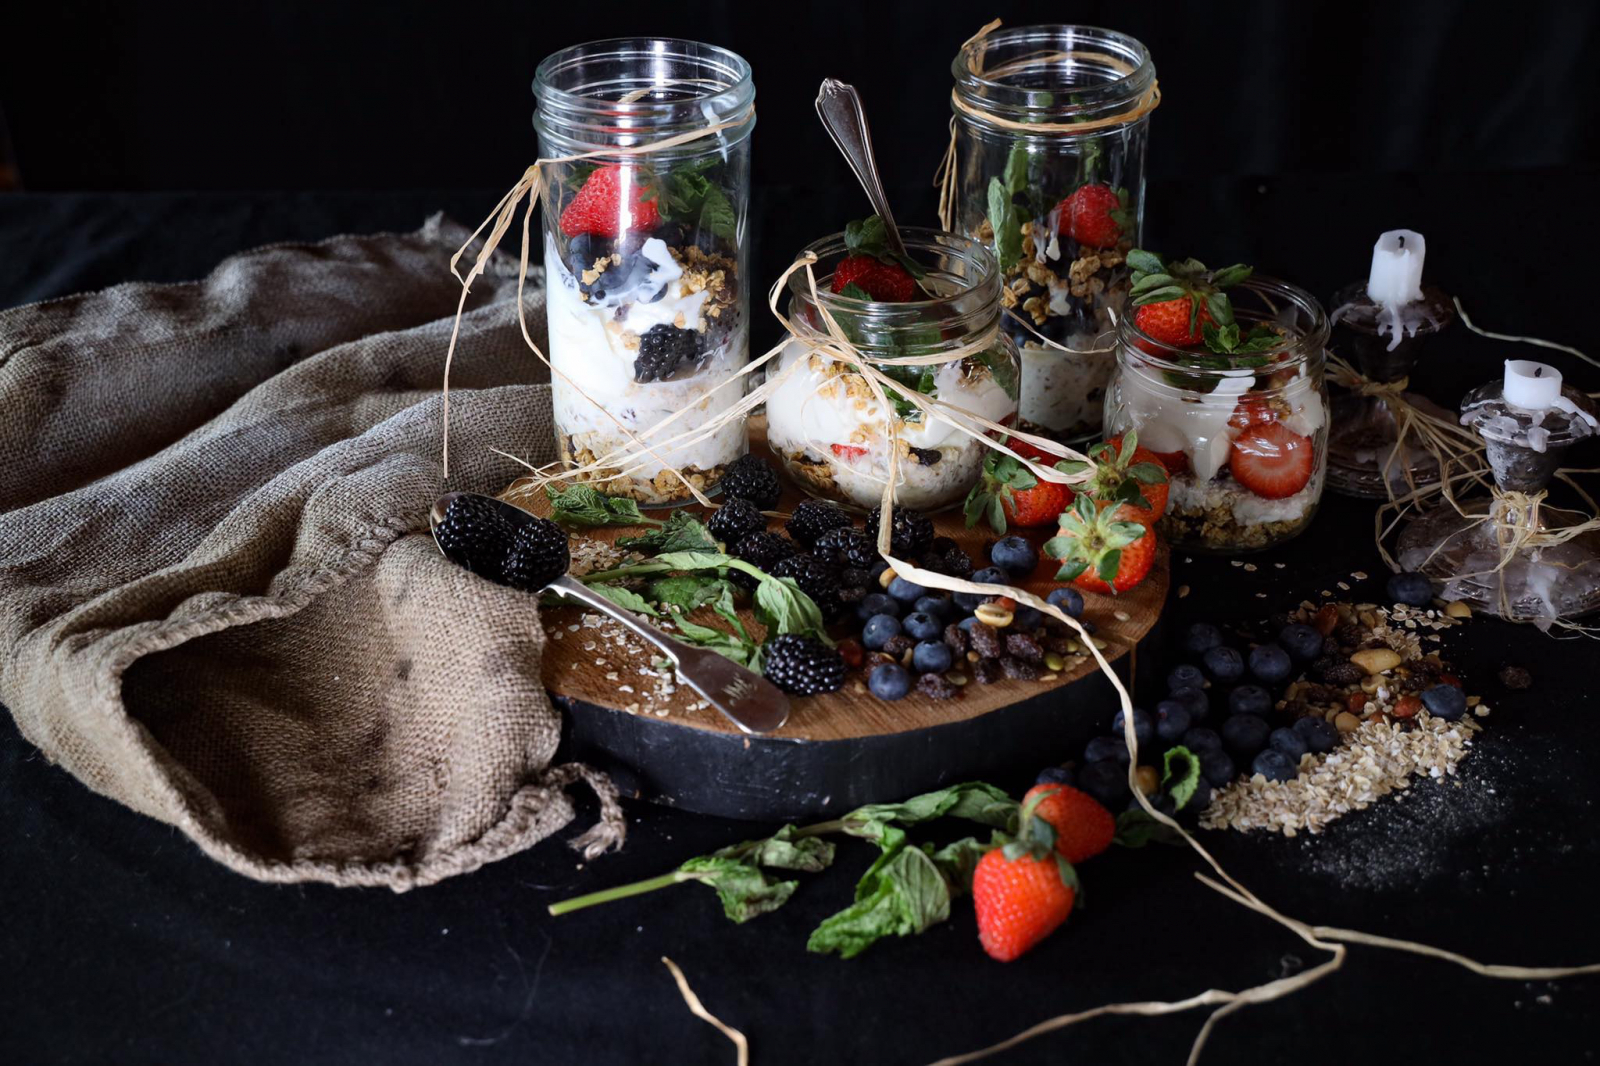
One of the community's most creative photographers is Lysle Barmby. Her energy and creativity is off the charts. She adds so much exuberance to the Community! Wouldn't you love to borrow her creative mind for a day? Lysle's photos normally include many complex elements. She uses rich tones and textures to tell her story.
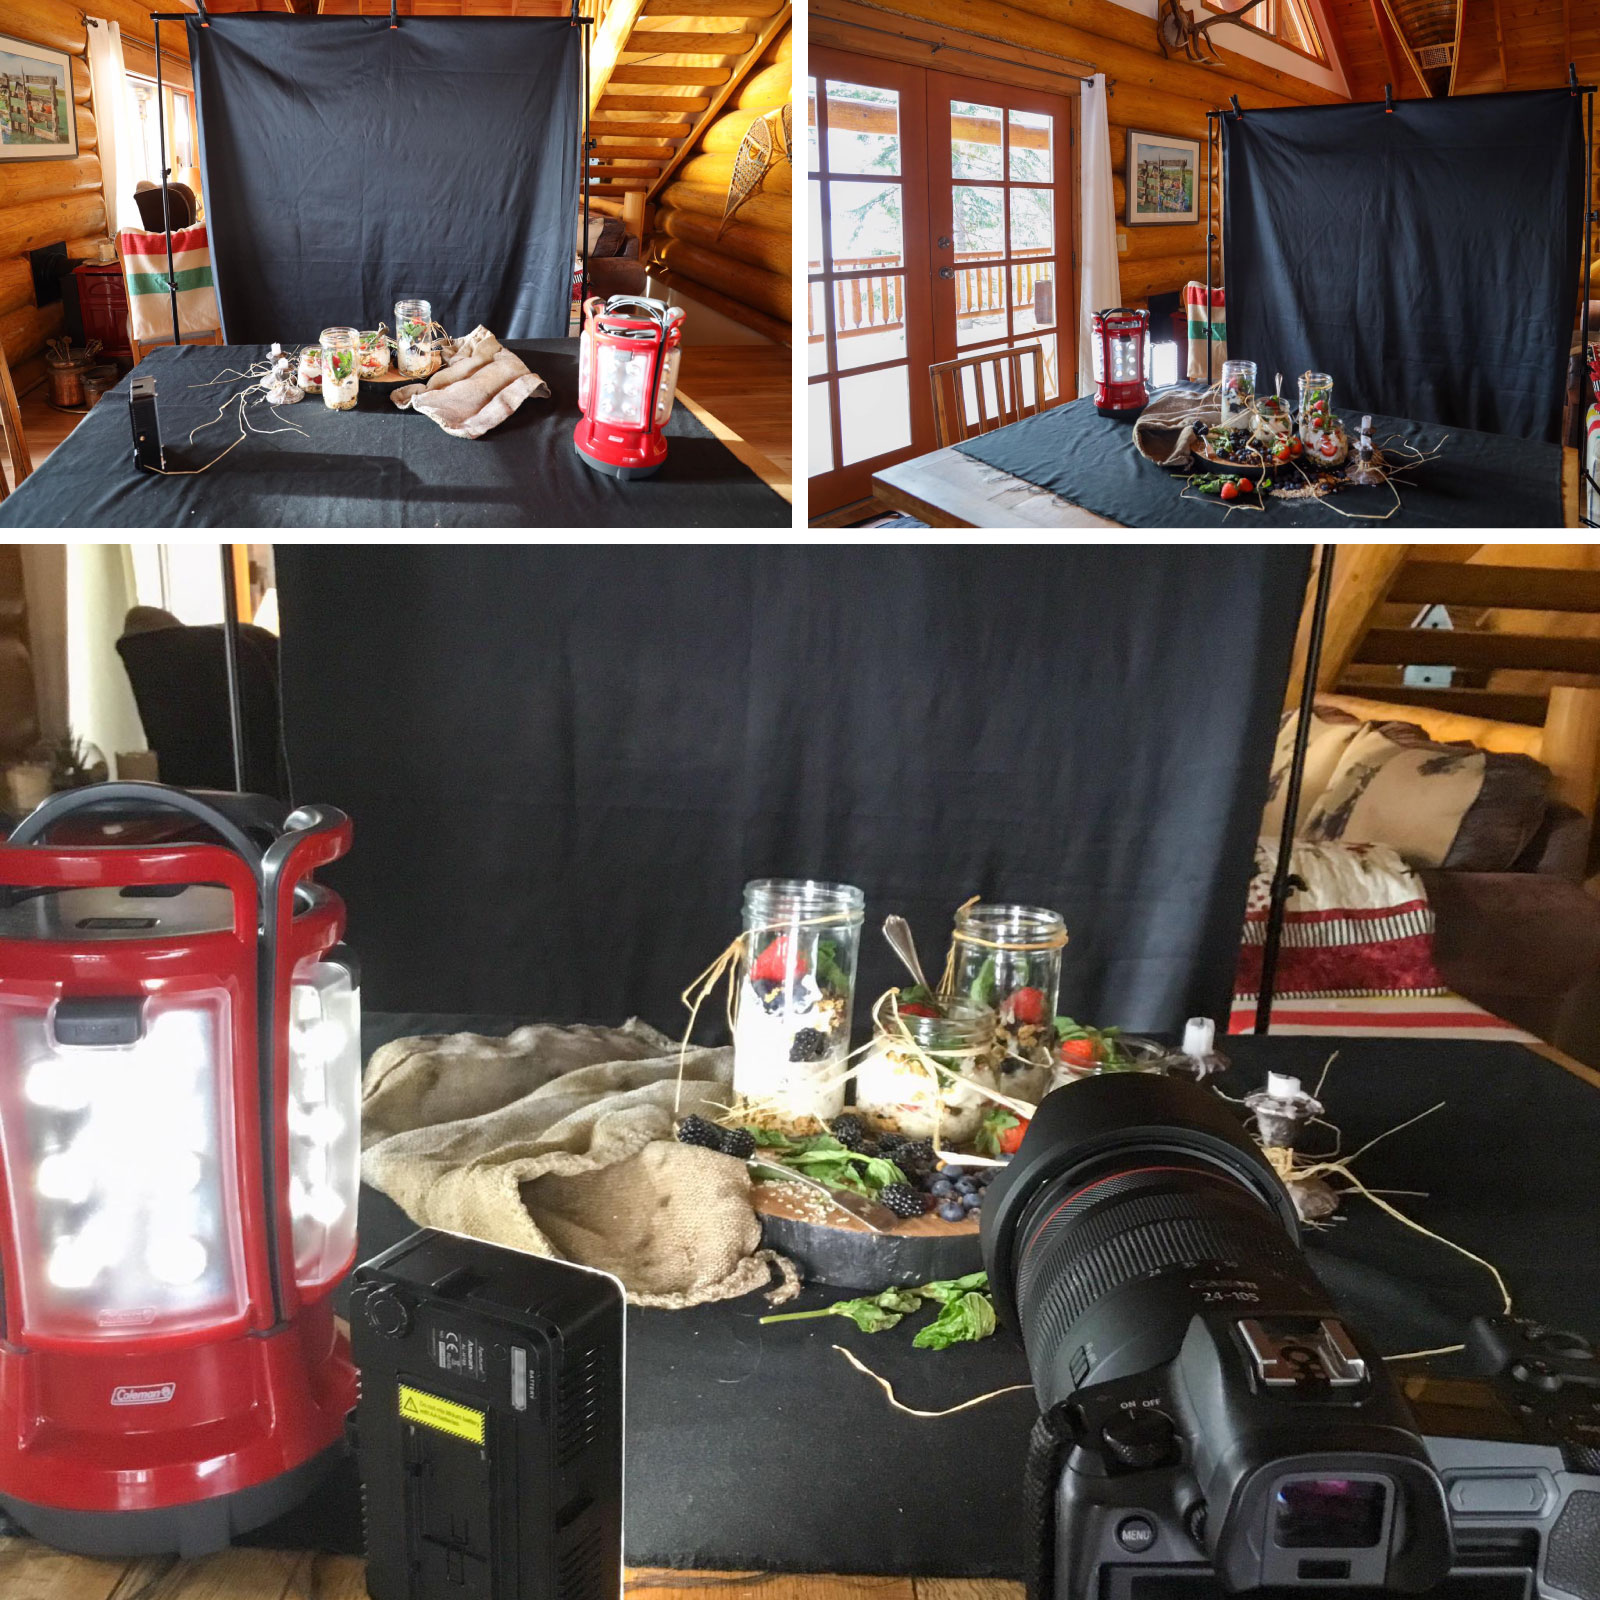
Surprise! Lysle shares a behind the scenes look at one of her typical set-ups. Lysle often improvises with artificial lighting. She uses her dining room light, deck door light, a large garage flashlight and a small battery powered light. She doesn't even own an on-camera flash! Her backdrop is a frame that she uses to drape fabric remnants or blankets. Genius! No big expense... no fancy studio... and just look at her gorgeous photos!
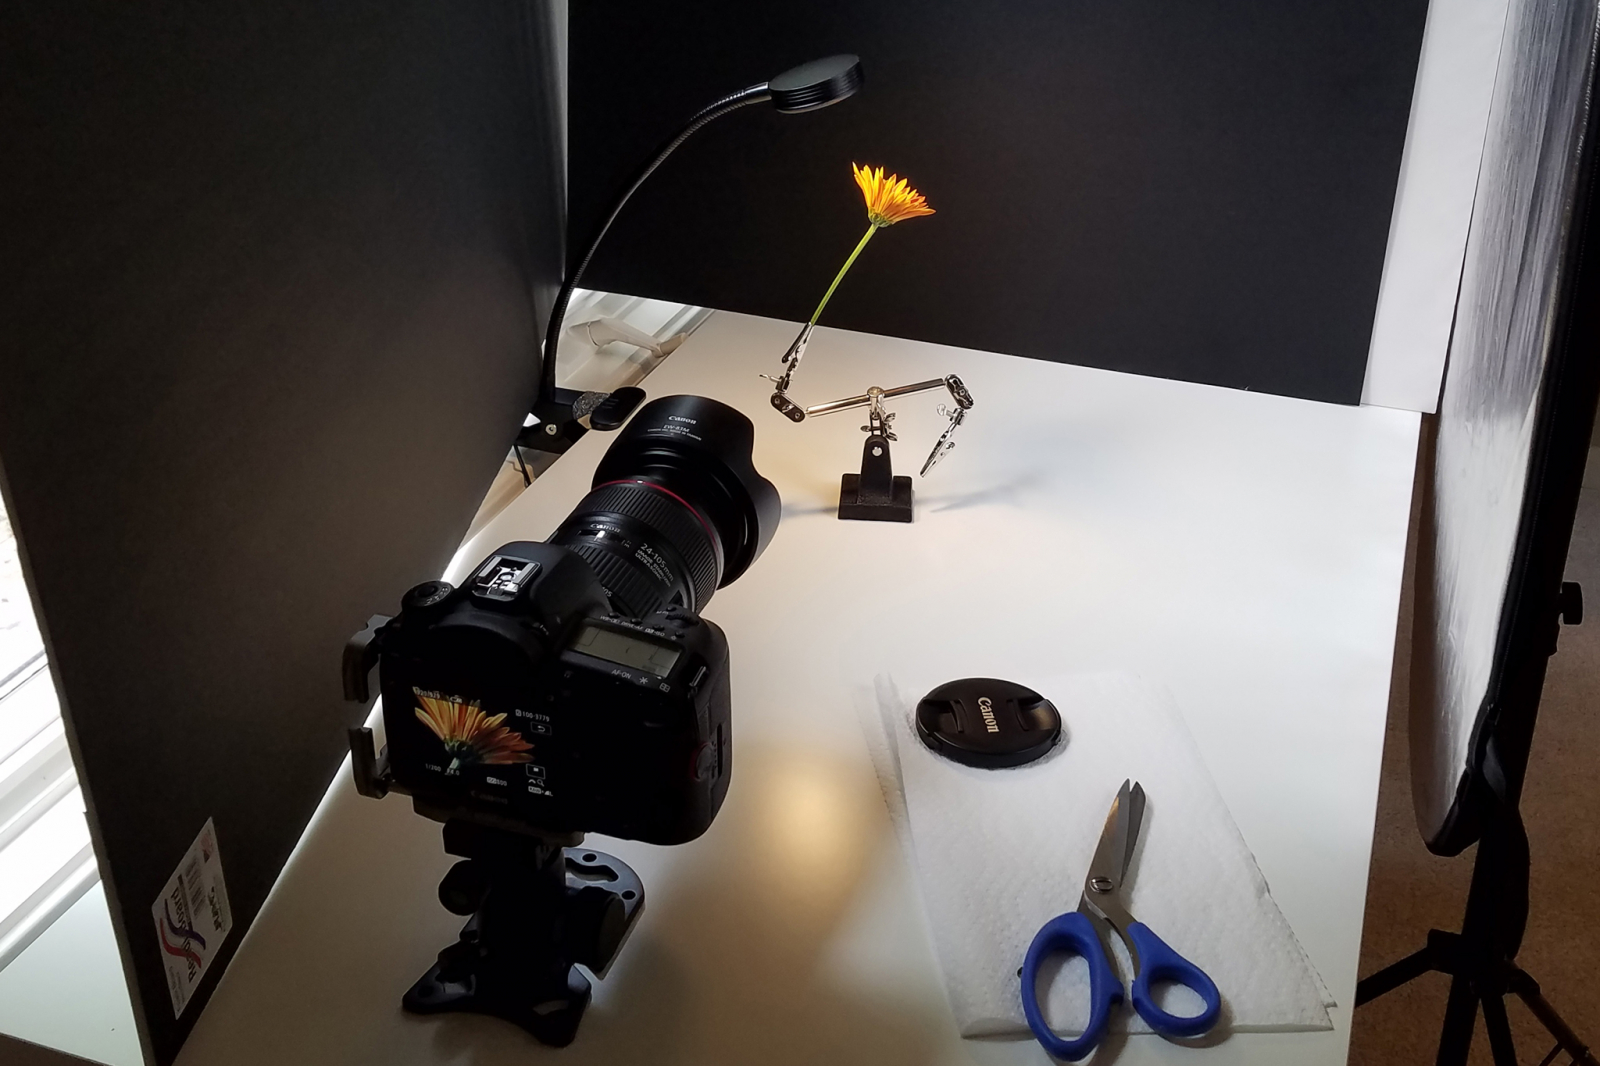
Last, but not least, is Martha Schlesselman. Martha was the first to impress me with her use of artificial light that looks very natural. Martha's use of contrast and vibrant colors creates those wow factors. Just look at this beautiful photo that Martha created...
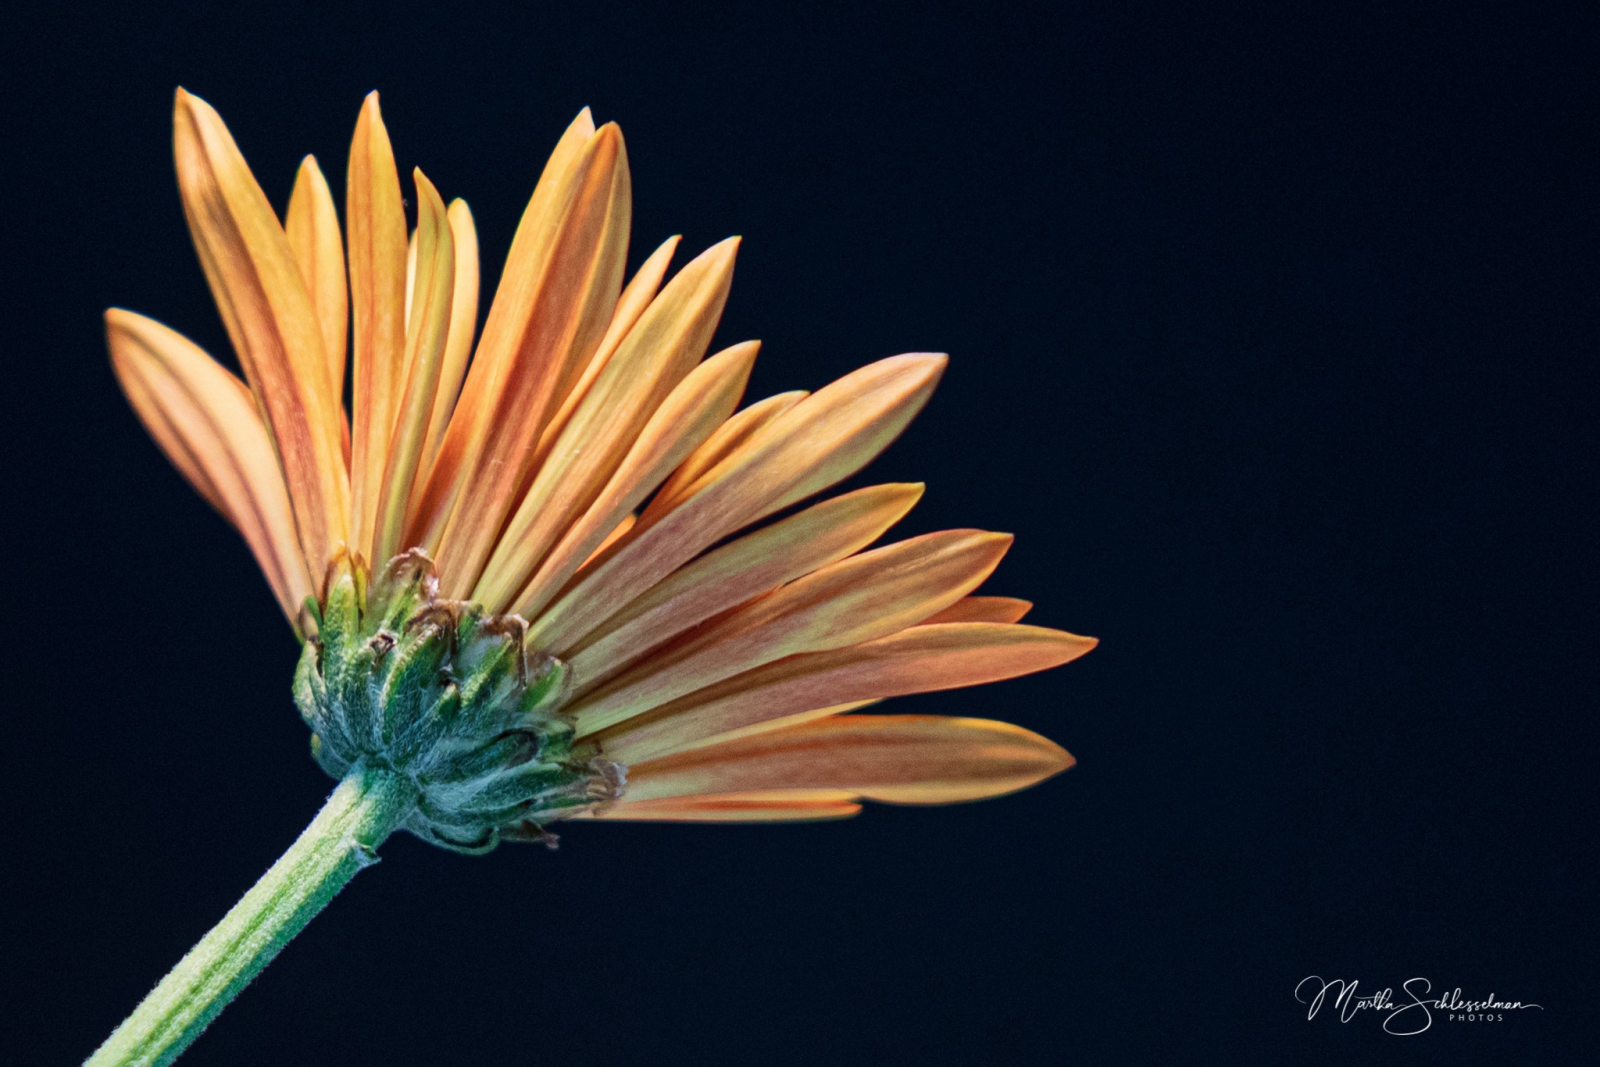
Martha explains: "In this setup, there’s a window to the left of my camera, but it was a cloudy day and the light was dreary at best. So I used black foam core board to block the window light and created my own with these fun clip-on lights. They have three color temperatures with different levels of brightness and are my go-to source for all kinds of scenarios when natural light is not available, or just not right for the job. (I have four of them and will often use multiple lights at different angles.) I have a reflector on the right to direct the light that bounces off my white table and to minimize shadows. Another gadget that comes in handy is this stand with moveable arms and clips. I use it a lot for single stem flower photography. In lieu of a tripod for these kinds of shots, I like to use the Platypod Ultra. It gets me closer to my subject and is a bit easier to adjust my camera angle if I’m not fiddling with tripod legs."
Here are the links to the products she used:
Hoping these behind the scenes set-ups inspire you to step out and try something different. It doesn't take a lot of space, time, or money. Thanks to our creative 365 Picture Today photographers who shared their knowledge with us.